In short
- Count the pieces on the punchboard and compare them with the component list.
- Give each setup location one row. Check the piece, the face that shows, and how many are there.
- Fix the diagram, then recheck each location and count the pieces left in common supply.
Download the blank check sheet (CSV) · Download the completed check sheet (CSV) · Download the illustrated proof (HTML)
The blank-observation sheet already has the fictional Glimmerfen Relay requirements filled in. Leave the observed and recheck columns open until you inspect the drawing. Use the completed sheet to compare your decisions, or replace the source columns with details from your own proof.
What goes on a board game token proofing sheet?
Begin with three things on the table: the punchboard proof, the rulebook component list, and the first setup diagram. Record the revision of each. We labeled the punchboard P1 and the rulebook R1, which contains both the list and the diagram. Next to each token name, write the code, shape, two faces, and punchboard positions. That gives you something to check when two pieces are close in size or the diagram is small.
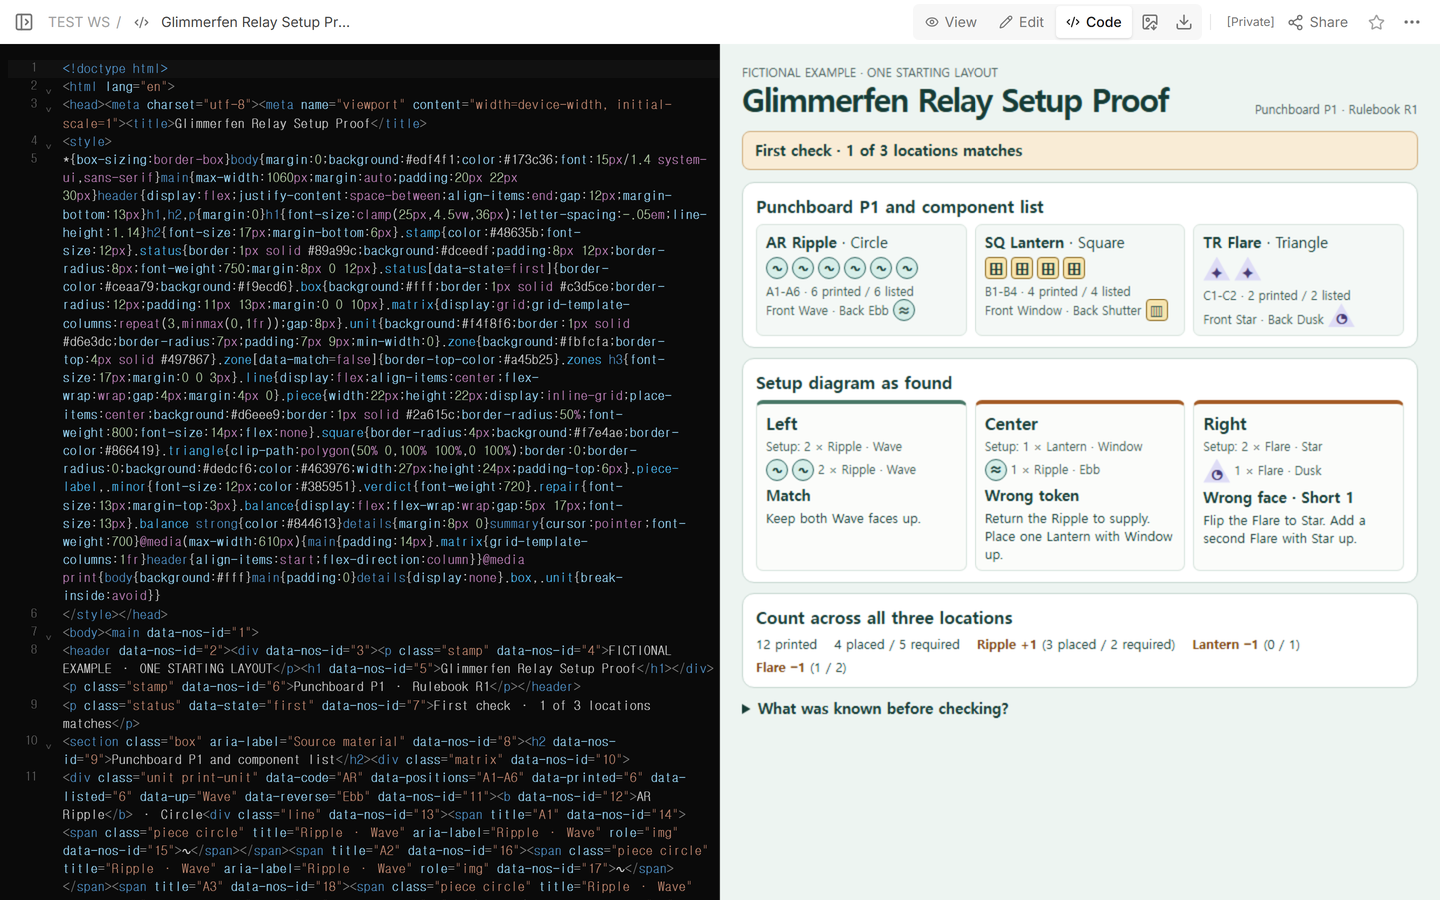
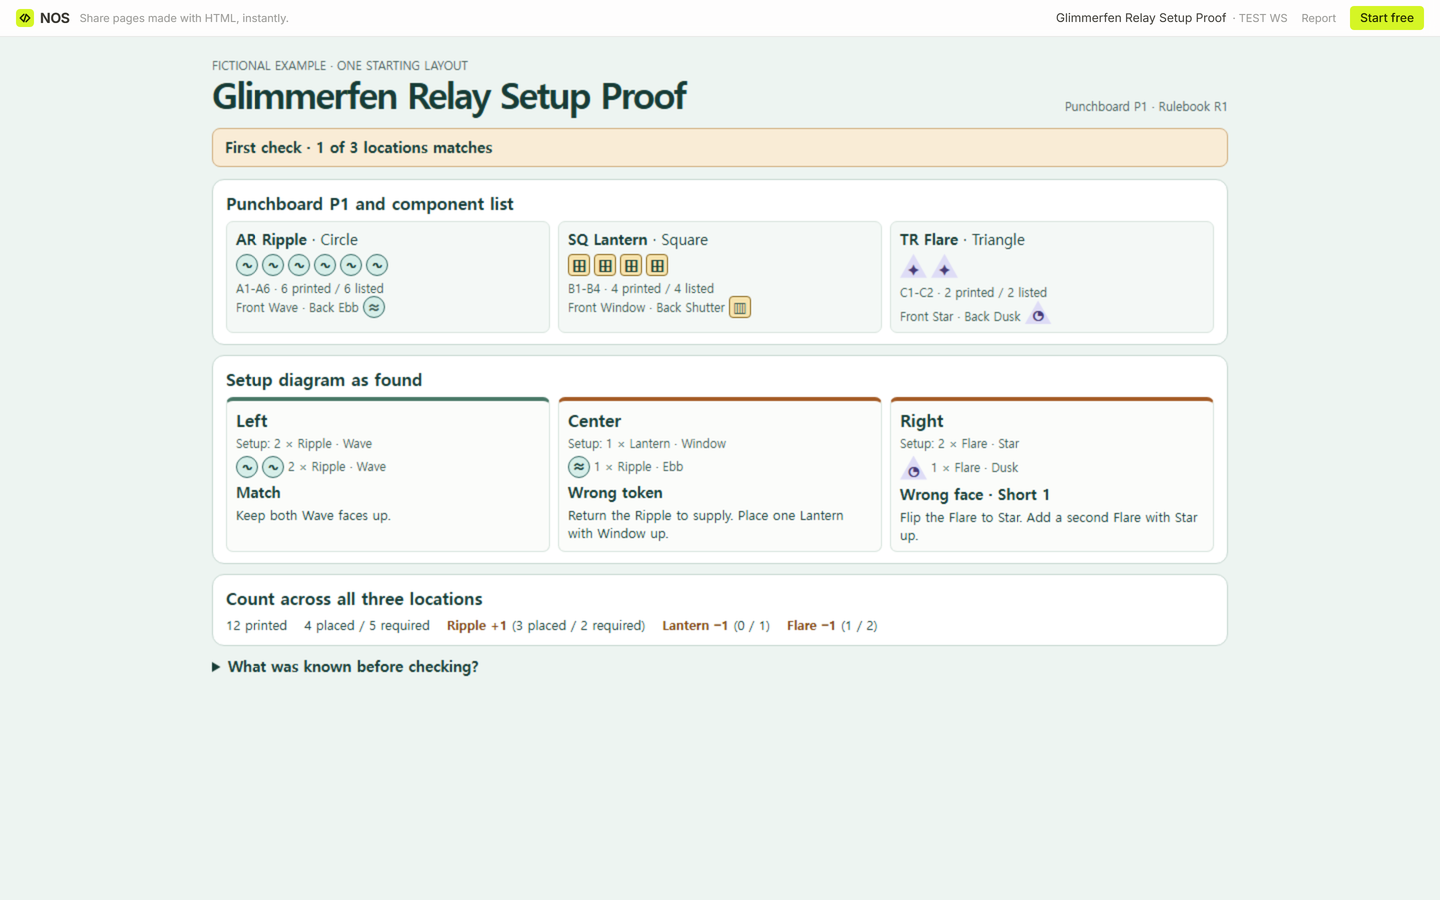
- AR Ripple. Circle, Wave front and Ebb back, positions A1-A6. Six printed and six listed.
- SQ Lantern. Square, Window front and Shutter back, positions B1-B4. Four printed and four listed.
- TR Flare. Triangle, Star front and Dusk back, positions C1-C2. Two printed and two listed.
Delano Games separates the component list and starting setup in its rulebook guide. The Game Crafter's punchout guide describes making the artwork and cut lines for individual shapes on a sheet. That distinction is why the count here is 12 individual tokens on one punchboard.
How do you check a setup diagram against the printed tokens?
Write one row per location in the diagram. All three begin as Unchecked. Read the rulebook to fill the required columns, then record what you actually see in the drawing. A location earns Match when its piece code, upward face, and quantity all agree. Count each location once, even if it has two problems.
- Left requires two Ripple tokens with Wave up. The drawing shows those two pieces. Mark Match.
- Center requires one Lantern with Window up. The drawing shows one Ripple with Ebb up. Mark Wrong token.
- Right requires two Flare tokens with Star up. The drawing shows one Flare with Dusk up. Mark Wrong face and Short 1.
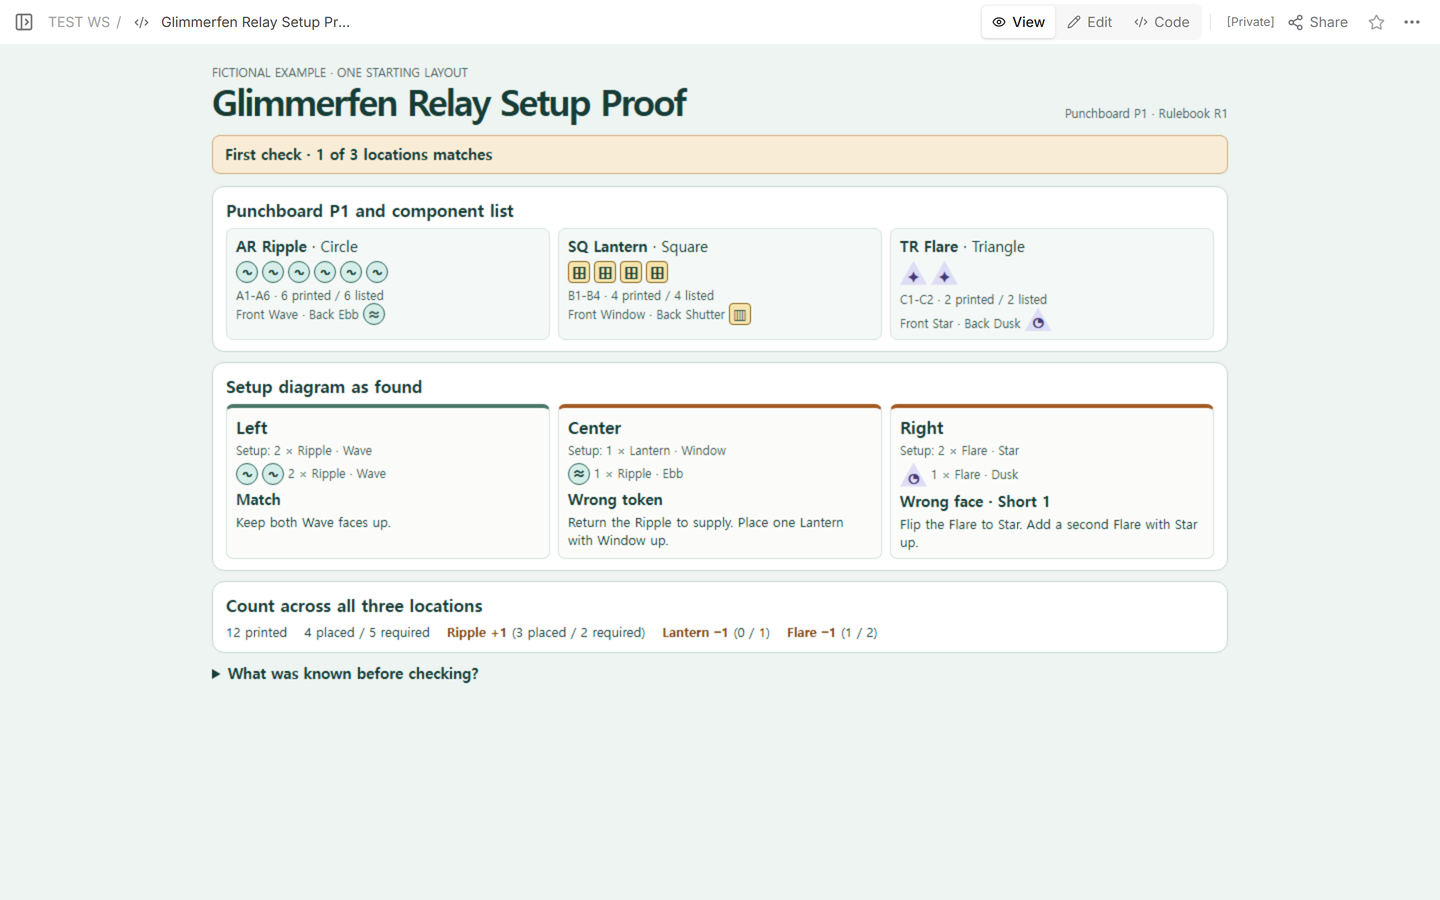
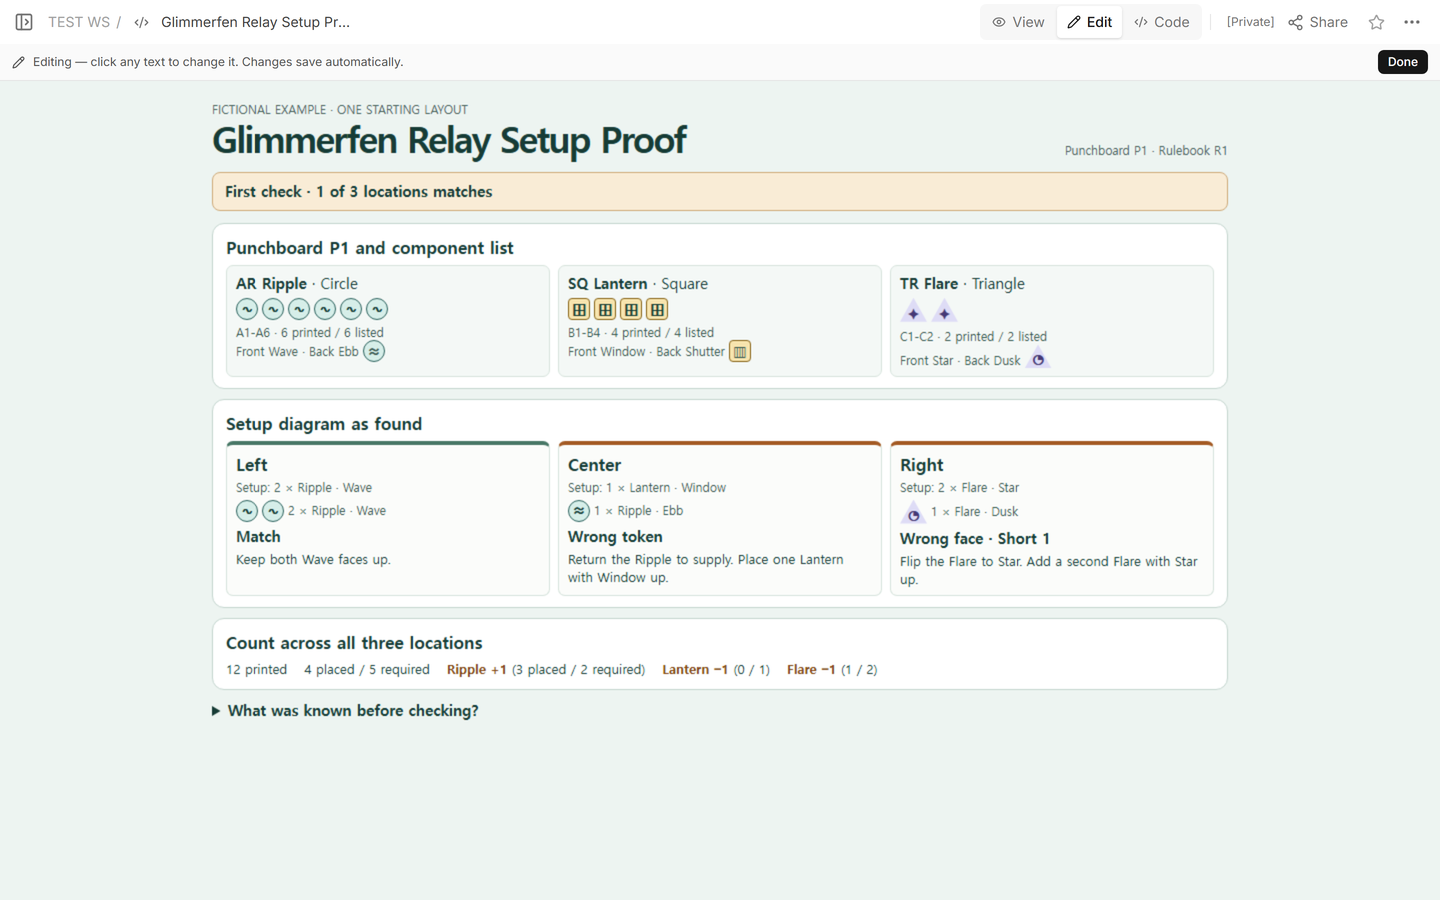
The first check is one of three locations matched. Across the drawing there are four pieces where five are required. The by-type count explains the difference: three Ripple instead of two, zero Lantern instead of one, and one Flare instead of two. Adding a single piece could bring the drawing to five and still leave the wrong token at Center.
Sharing the proof in NOS
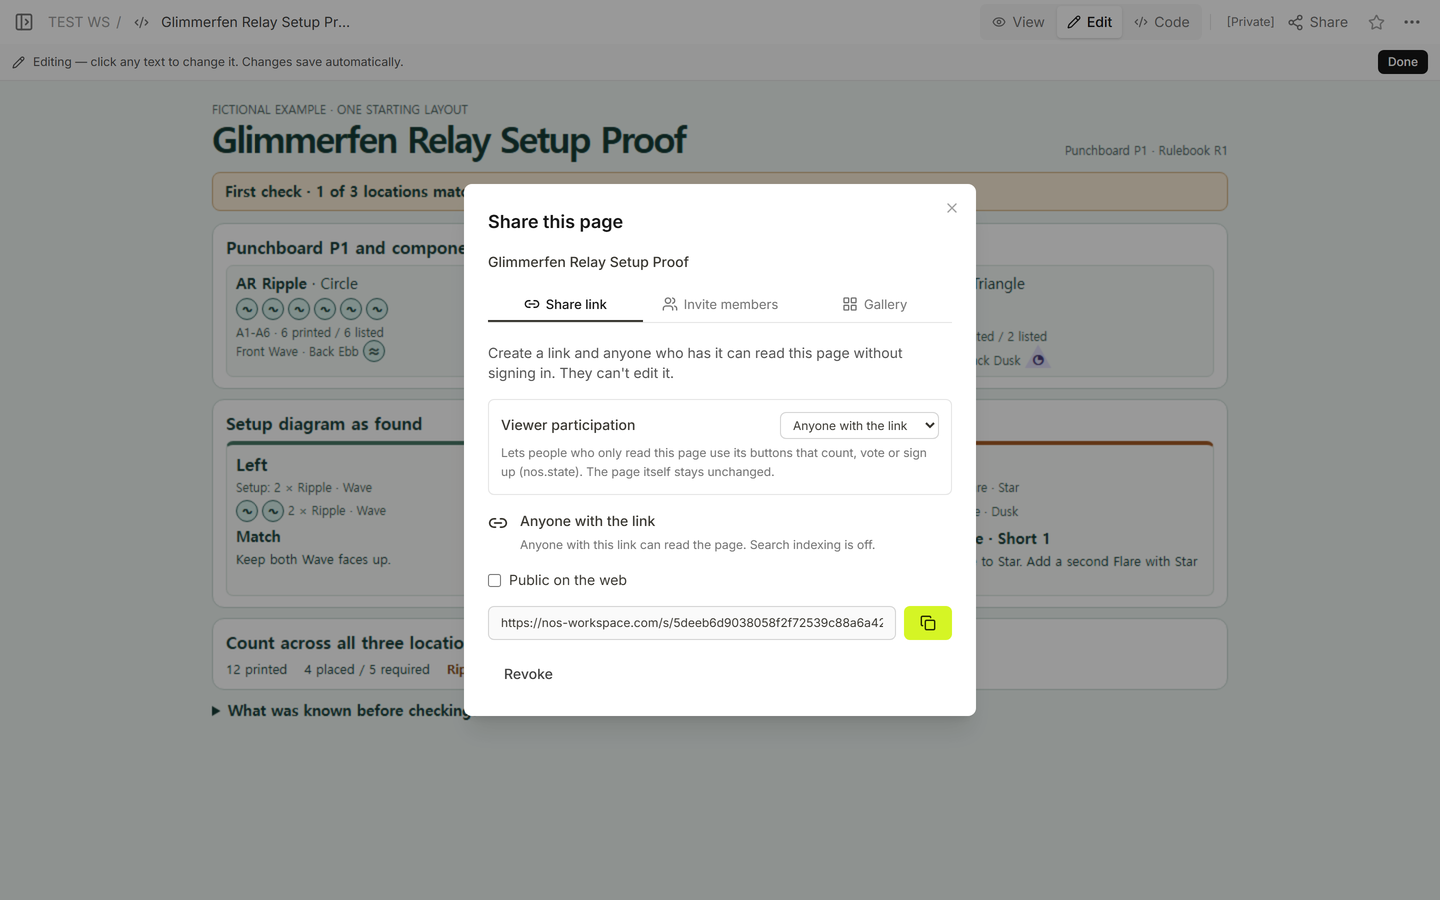
We loaded the fictional proof in Code, checked the first draft in View and Edit, and opened its reader link from Share while signed out. After correcting the diagram in Code on the same document, we reopened the reader link and checked the new counts. Current plan details are on the NOS pricing page.
What should you change, and how do you verify it?
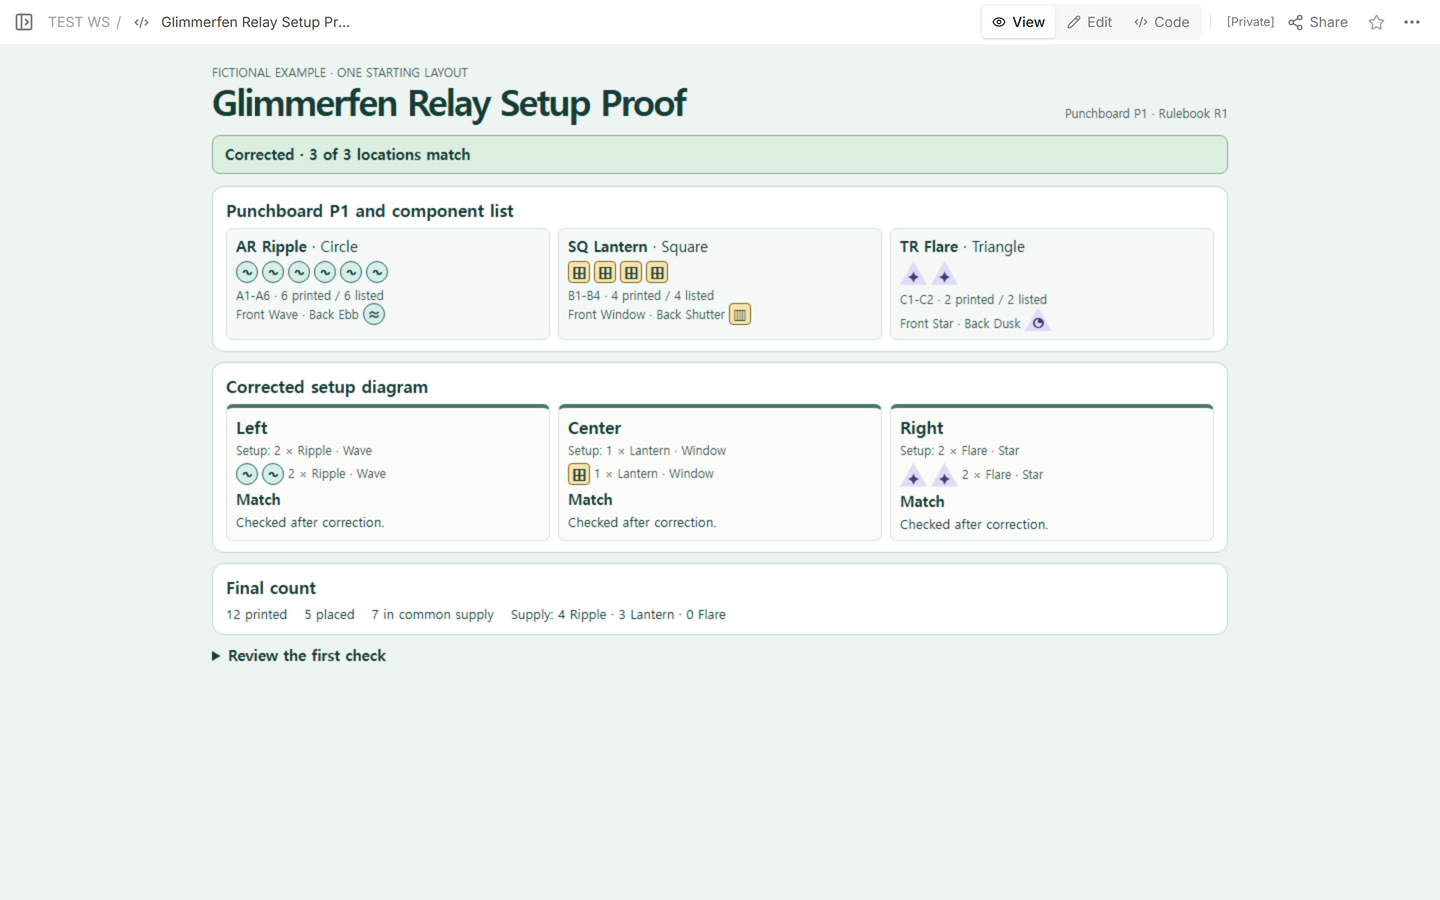
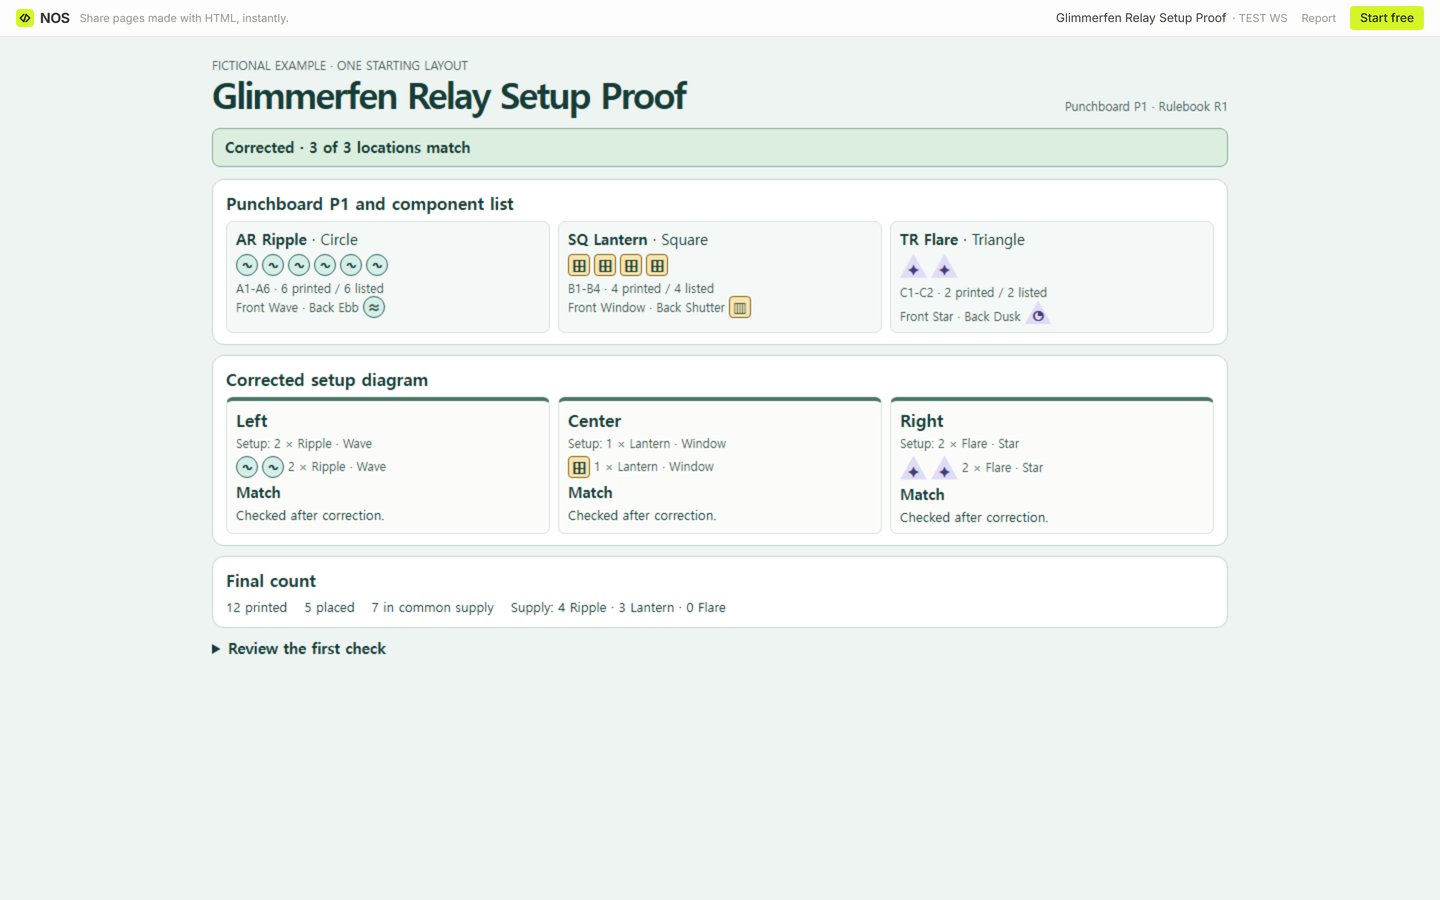
At Center, take the Ripple out of the drawing and put one Lantern there with Window up. At Right, flip the Flare to Star and add one more Flare with Star up. Leave Left as drawn. Record the new observations in the recheck columns so the first-pass problems stay visible in the completed sheet.
Read the three corrected locations again. The result is three of three matched. Subtract the placed quantity from the printed quantity for each type: 6 − 2 leaves 4 Ripple, 4 − 1 leaves 3 Lantern, and 2 − 2 leaves 0 Flare. Five tokens are on the board and seven are in common supply, which accounts for all 12 printed pieces.
When not to do this
Use a separate check for each player-count layout that changes the starting positions or quantities. If the punchboard and component list disagree, resolve the source discrepancy before correcting the drawing. Keep the printer's production proof and physical checks with the printer's approval process.
For a different production task, see the print job ticket template for handing off the approved file or the assembly manual example for checking a sequence of physical actions.