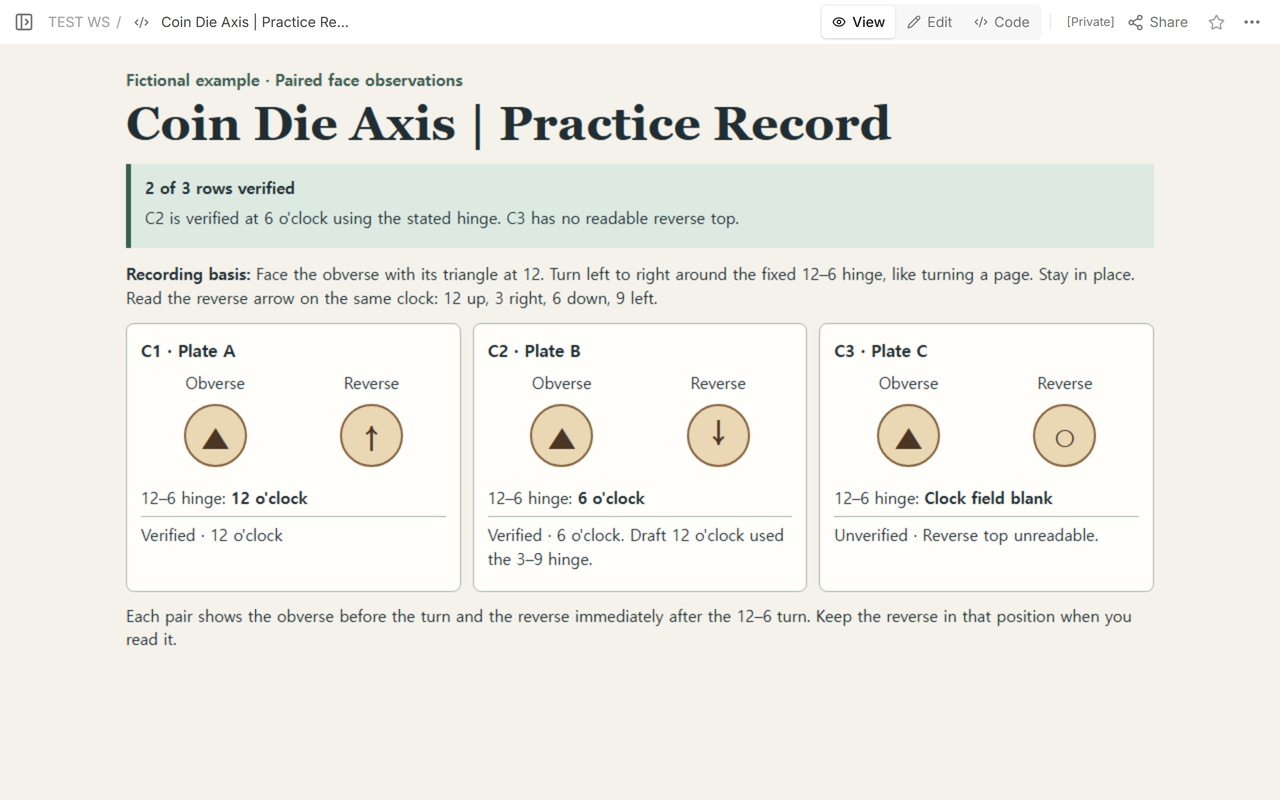
In short
- Start with the obverse triangle at 12 and turn the disk left to right around the 12–6 hinge.
- Keep the clock fixed from your viewpoint and record where the reverse arrow points.
- Leave the hour blank before observation and when a check finds no readable top. Give the reason when you've attempted the check.
Die axis describes the alignment of the obverse and reverse designs. In this practice set, the triangle identifies the top of the obverse and an arrow identifies the top of the reverse. Each pair has one ID and one source plate, so a checker can repeat the turn with the same two faces.
- Download the interactive practice plates and open the file locally to toggle the two turns.
- Download the blank recording sheet and type in the fields or print it.
- Download the worked record to check your rows.
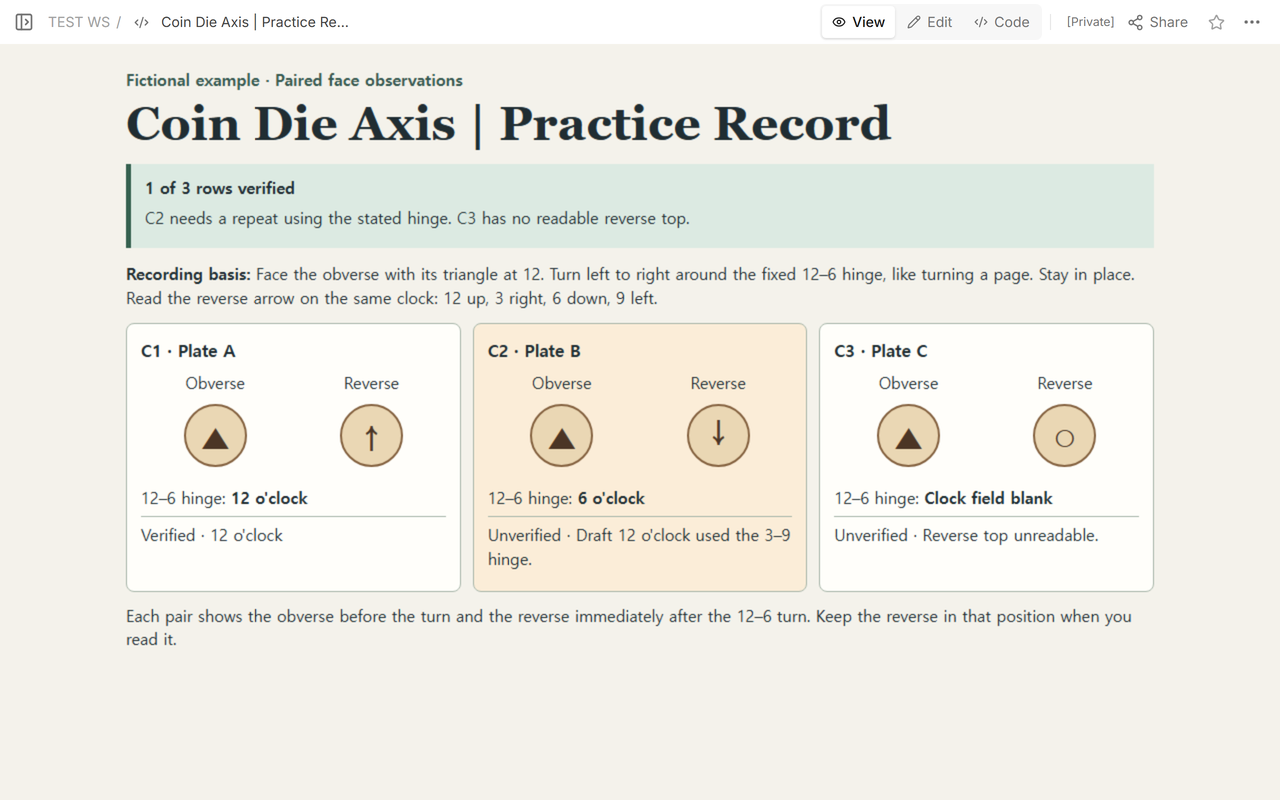
How do you measure the clock position?
- Start in the obverse view on the practice plates. The triangle on each disk points to 12. Note the pair ID and plate letter on the blank sheet.
- Choose the reverse view for the 12–6 hinge. This models a half-turn like turning a page. Keep the clock where it is and look at the reverse from the same position.
- Read clockwise from 12 at the top. An arrow pointing right is 3, down is 6 and left is 9. Write the position the arrow reaches before turning the reverse upright.
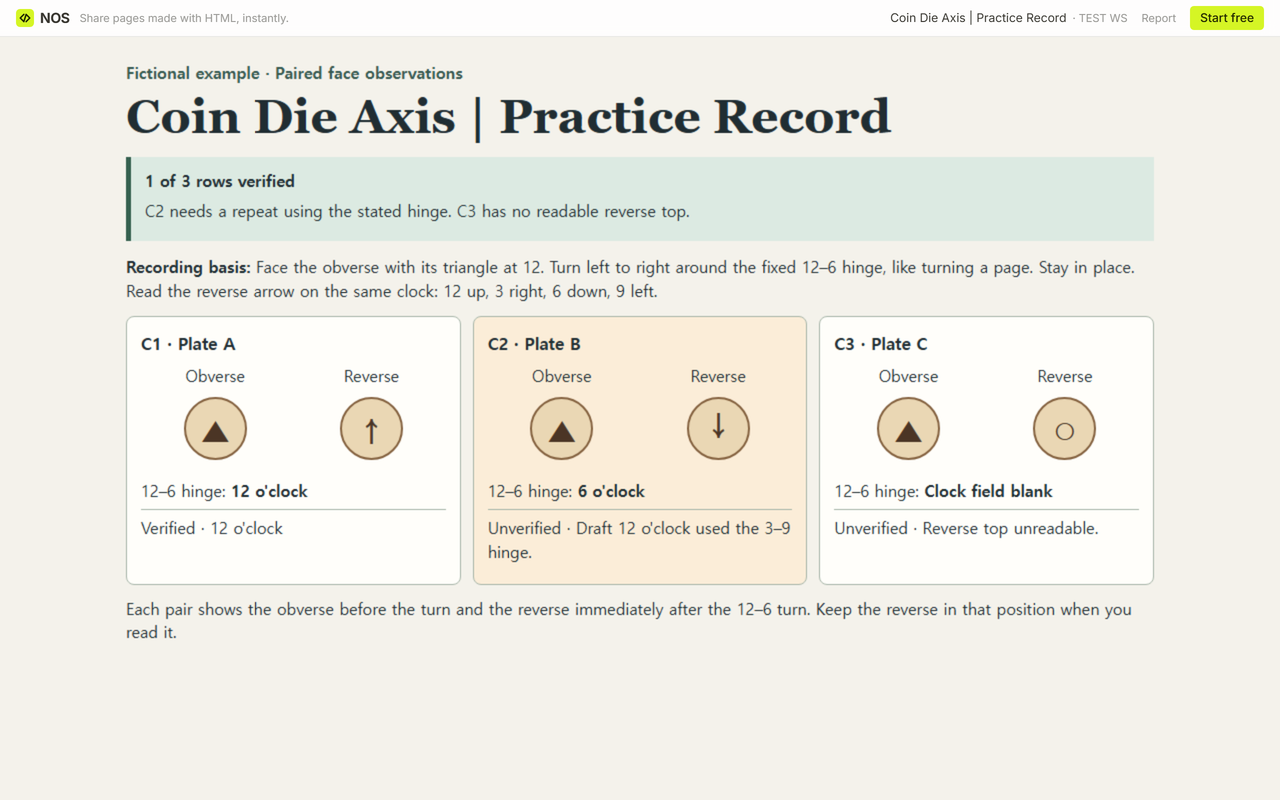
- Return to the obverse and repeat the same turn. Record the result and its check status. On C3, the reverse circle has no top marker, so leave the clock field empty and write “Unverified · Reverse top unreadable.”
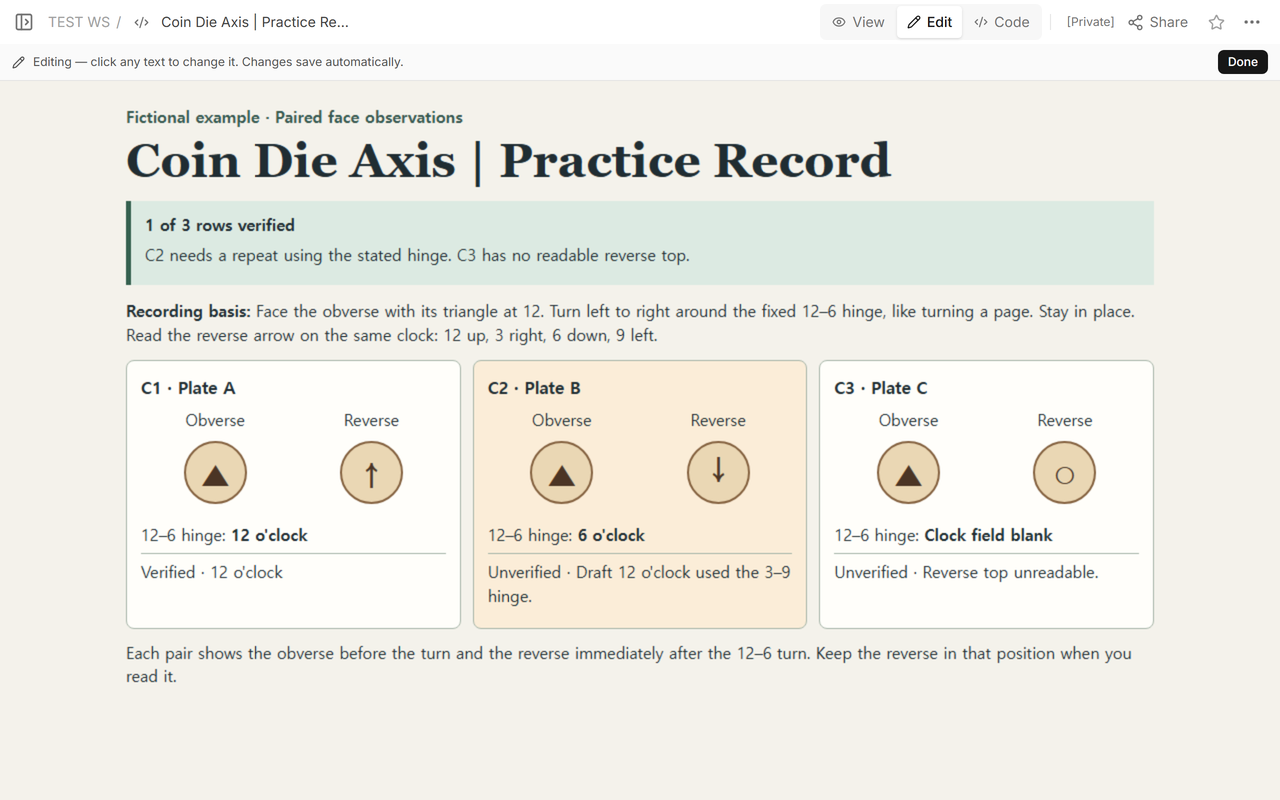
Why does C2 read 12 with a different hinge?
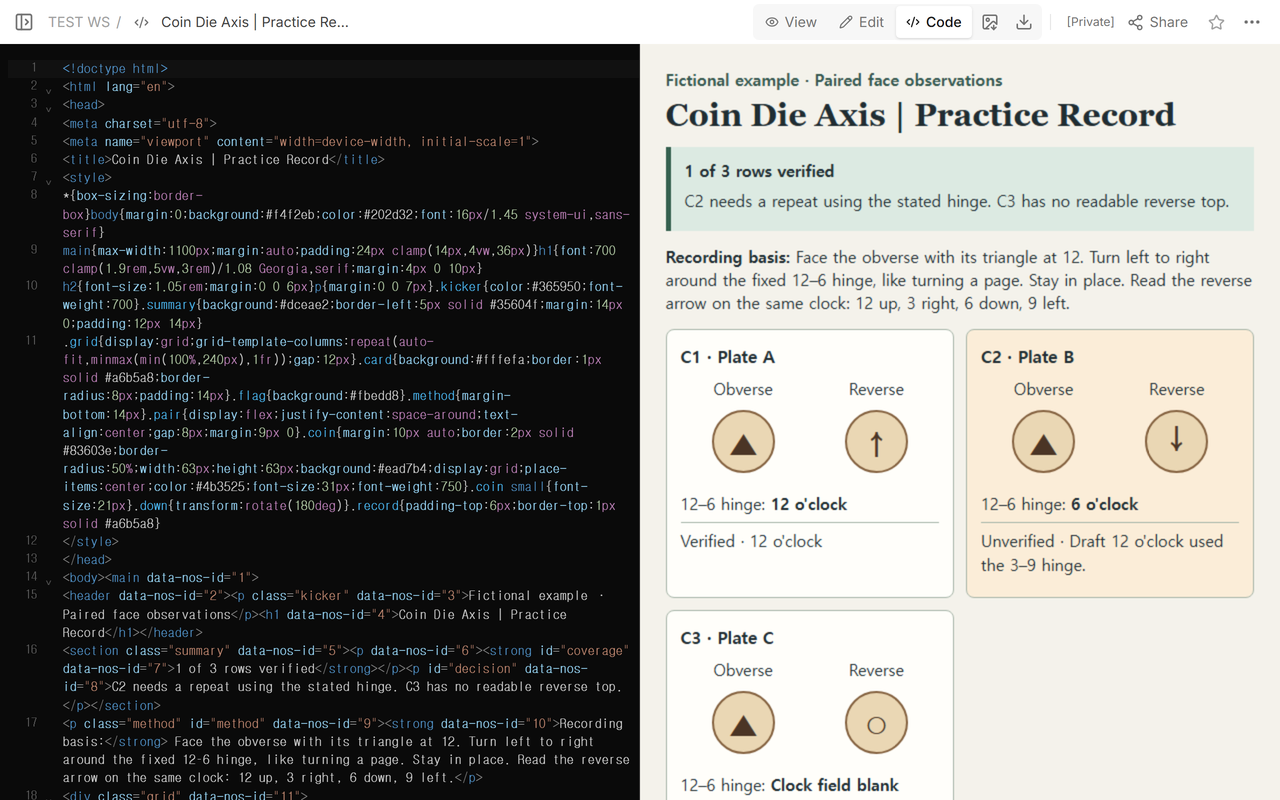
On plate B, choose the 3–9 hinge to turn the disk top to bottom. The reverse arrow now points up, giving 12. Reset to the obverse and choose the 12–6 hinge. The arrow now points down, giving 6. The two readings differ by half a turn. Keep the 3–9 result in the notes so another reader knows how the draft arose.
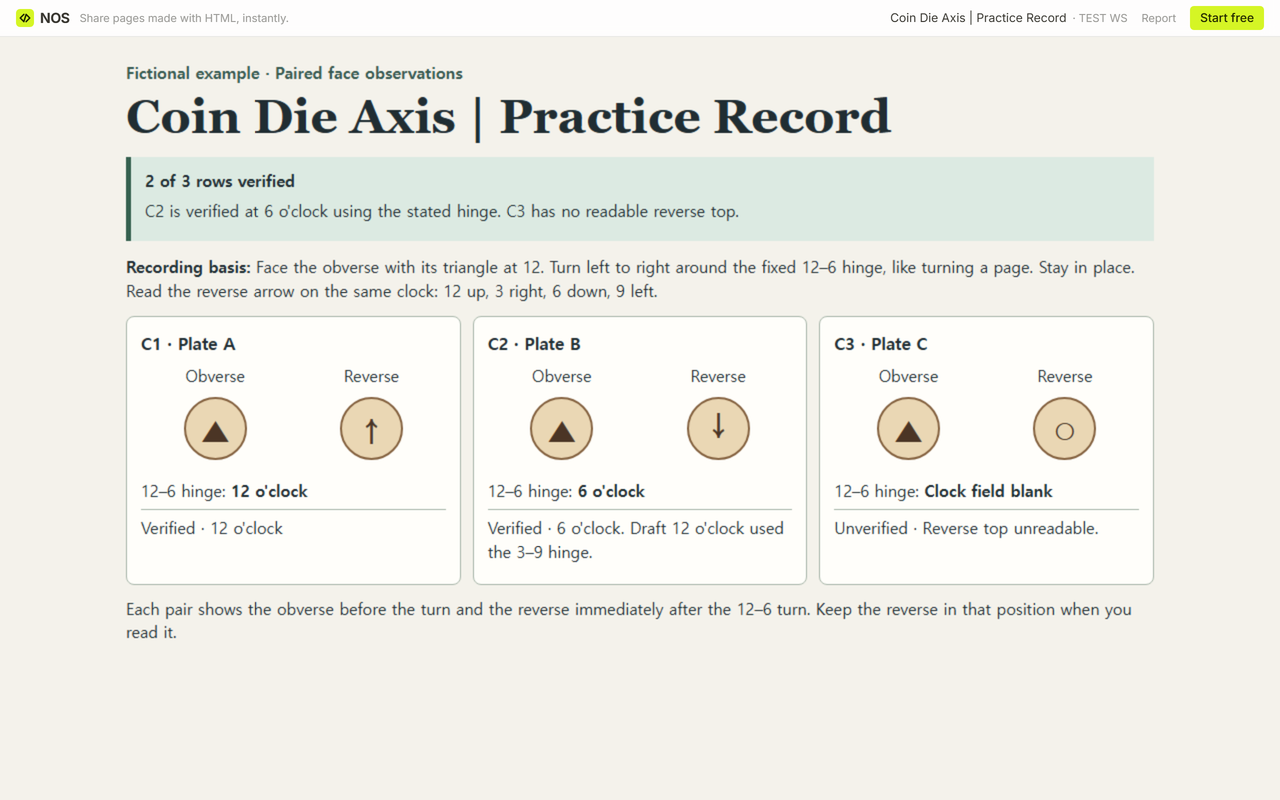
For the record, C1 is 12 and C2 is 6 under the 12–6 method. The review starts with C1 verified, C2 carrying an unverified draft of 12 and C3 unverified with an empty hour. Repeating the prescribed turn verifies C2. That brings the record from 1 of 3 verified rows to 2 of 3. C3 still has no readable top.
Do catalogue sources describe the same turn?
The CIfA glossary defines die axis as the alignment of the two dies. Roman Provincial Coinage explains how its entries transcribe obverse and reverse inscriptions. An Ashmolean catalogue entry shows the hour in its description and leaves the turn unspecified. The Sardis recording guide uses a vertical turn and shows direction with arrows. The Sylloge Nummorum Graecorum guidelines accept hours or equivalent degrees and exclude arrow notation. On this sheet the arrow is the mark you observe. The hour is what you record.
When not to do this
Use your collection’s required convention if it specifies a hinge or an angular notation. When all you have are independently straightened face images, ask for a paired view with its turn documented. For a chip location, use a condition report. For display and handling directions, use an artwork information sheet.
How did the correction reach the reader?
We used NOS Workspace to inspect the draft in View and Edit, then updated the C2 row in Code. We reopened Share and opened the same reader link while signed out. The reader saw C2 verified at 6, with the earlier 12 still explained in the note. Open the verified practice record.