Start from the questions, not the headings
On GitHub, a README is often the first thing a visitor sees in a repository. README files typically cover what the project does, why it is useful, how to get started, where to get help, and who maintains and contributes to it.
Those five answers make a better spine than any section list. A badge row or a roadmap can come later. If a visitor can't tell what the tool does from the first line, extra sections won't fix that.
A few mechanics are worth knowing before you write. GitHub shows a README placed in the repository root, the hidden .github folder or the docs folder. If there is more than one, the .github copy wins, then the root, then docs. Anything past 500 KiB is cut off when the README is viewed on GitHub, and longer documentation is better kept in a wiki, so the README can stay focused on getting started and contributing.
One filled example: a small link checker
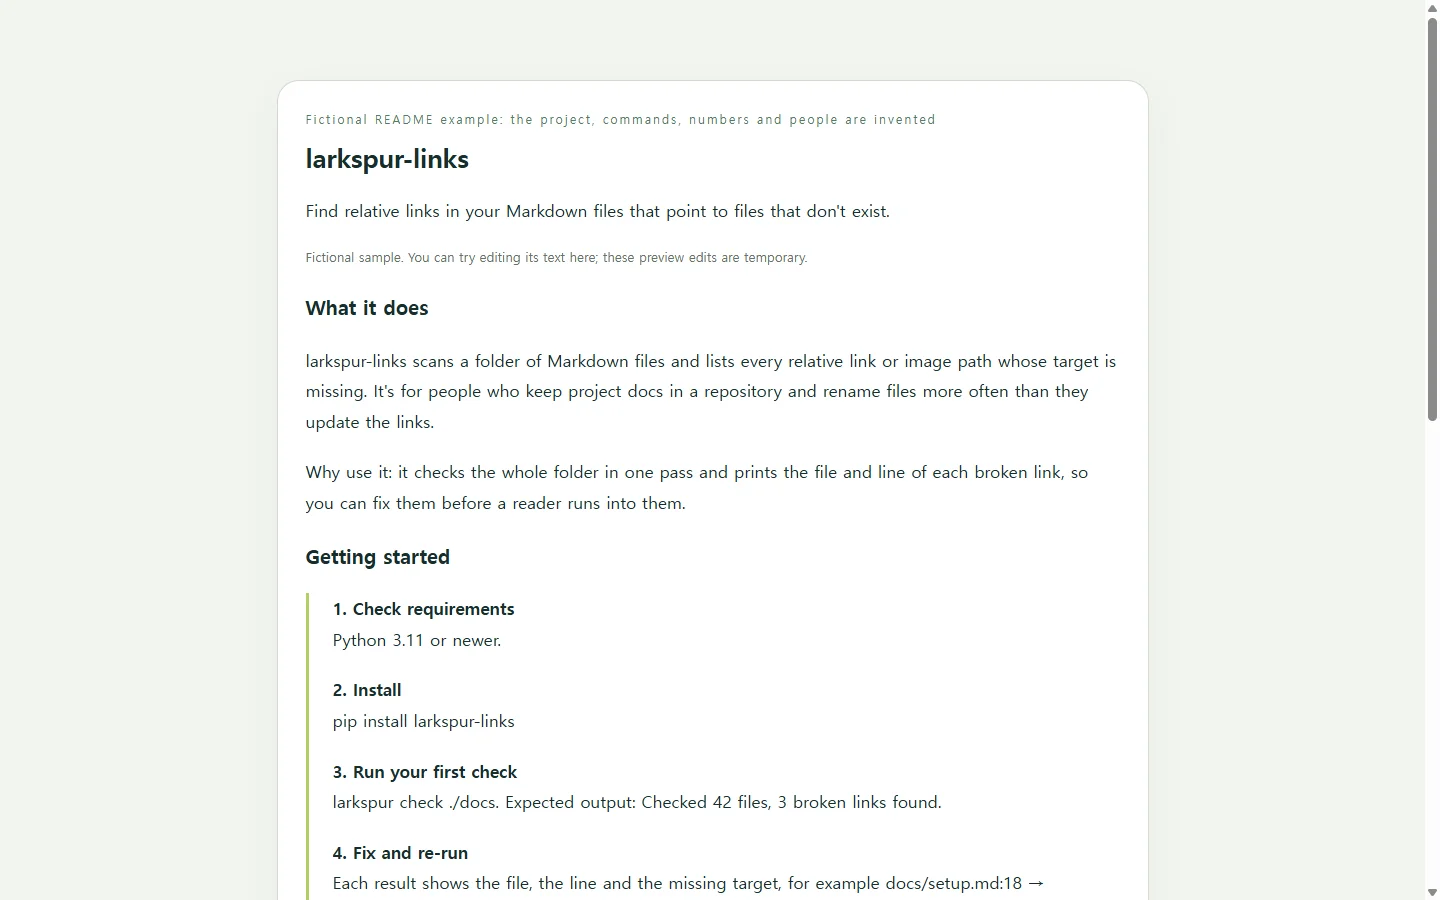
The example page shows a README for larkspur-links, a made-up command-line tool that scans a folder of Markdown files and reports relative links pointing to files that don't exist. The project, its commands, its numbers and its maintainers are all fictional, so don't try to install it.
Three choices are worth copying. The first line says what the tool does and who it's for. The quick start is a few steps you could actually type, ending with the output you should expect, so a reader knows the install worked. The options sit in a narrow table, because someone scanning for one flag wants to find a row, not read a paragraph.
What it leaves out matters too. There's no roadmap, because the fictional maintainers haven't planned one. There are no tech-stack badges either, because people using a link checker care about the command, not the libraries behind it.
Pick a starting point that fits your project
You have real choices here. Some popular full templates come with a blank version you can copy and prune, which suits an open-source app that expects contributors. Command-line generators can write the file for you. A short hand-written README that gives the five answers above is often enough for a library or a class project. Drafting with an AI chat is another option, and it helps most when you have the facts but not the time to arrange them.
Drafting yours with AI, from your own facts
The risk with AI is invention: an install command that looks right but doesn't exist, or a flag you never wrote. The prompt below guards against that by giving the AI every fact up front and asking for a marked TODO wherever one is missing. Replace each bracket with your real details, and paste your commands exactly as you run them.
The output requirements in the prompt each have a purpose. A single top-level heading, with levels in order below it, gives screen-reader users a usable outline. GitHub also builds the README's Outline menu from those section headings. Alt text on images and link text that names the destination help anyone who can't see the screenshot. Narrow tables and short code lines keep the page readable on a phone. Relative links to files like docs/CONTRIBUTING.md keep working when someone clones the repository, but absolute links may break in a clone.
Before you commit the draft, check it in your terminal. Run every command it lists in a fresh folder. A README that fails at step two costs you more trust than a short one does.
When someone outside GitHub needs to read the draft
Sometimes the person who should check the wording doesn't work in the repository. It might be a supervisor approving a lab project's release, or a teammate who writes documentation but doesn't review pull requests. If your reviewers already work on GitHub, open a pull request with the README and skip this part.
Otherwise, ask the same chat for a single HTML file containing the same README. HTML is the format web browsers display, so your reviewer sees formatted headings and tables instead of raw Markdown. In NOS you can keep that page in your workspace and share a link to it. Your reviewer can open it without creating an account.
Say they reply that the first line should mention 'Markdown files' instead of 'docs'. You click into the page and change those words directly, without a new AI request. The link they already have doesn't change, and it now shows the corrected sentence. You don't send a second file, and they don't have to compare two versions.
Treat that page as a review copy. Once the wording is settled, carry the changes into README.md and commit it, because the repository is where the README has to live.
A prompt to adapt
Write a README.md for my GitHub repository in GitHub Flavored Markdown. Use only the facts below. If a fact is missing, write a clearly marked TODO instead of guessing.

Project name: [PROJECT NAME]
What it does, in one sentence: [ONE SENTENCE]
Who it is for: [AUDIENCE]
Why it is useful compared with doing the task by hand: [REASON]
Requirements: [LANGUAGE OR RUNTIME AND MINIMUM VERSION]
Install commands, exactly as I run them: [COMMANDS]
One working usage example and its real output: [COMMAND AND OUTPUT]
Main options (name, default, what it does): [OPTIONS]
Where to get help: [ISSUES PAGE OR CONTACT]
Maintainers: [NAMES OR HANDLES]
License: [LICENSE NAME]
Other docs in the repository: [RELATIVE PATHS, e.g. docs/CONTRIBUTING.md]

Requirements:
- Section order: one-line summary, why it is useful, getting started (requirements, install, first run with expected output), usage, options table, getting help, contributing, maintainers, license. Leave out any section I gave no facts for.
- Do not invent commands, flags, version numbers, badges, benchmarks, screenshots or contributors.
- Use exactly one H1 (the project name) and keep heading levels in order without skipping a level.
- Link to files inside the repository with relative paths.
- Give every image alt text that describes what it shows, and never put important information only inside an image.
- Write link text that names the destination; never use 'click here'.
- Keep tables to three columns or fewer, and keep code lines short enough to read on a phone screen.
- Put every command in a fenced code block with a language tag.
- Return only the Markdown, with no commentary before or after it.