Sort the list by when, then put a name on every line
Onboarding covers more than paperwork and an orientation session. A university HR checklist we reviewed describes it as a joint effort across departments and splits the manager's part into three windows: before the first day, the first day, and the period after it. That split is worth borrowing because each window has a different job.
Before day one, the job is removing surprises. Confirm the start date, the start time, and who will meet your new hire, then send parking or transit details and a word about what people usually wear. This is also when to line up the workspace, keys or access card, and computer accounts, since those often sit in someone else's queue.
On the first day, the job is orientation, not output. Welcome them, show them their workspace and basics like restrooms and exits, introduce the team, and name one colleague they can go to with questions. Cover how to report a sick day and request time off, and walk through the checklist itself so the rest of the week isn't a mystery.
In the first week, the job is checking that things actually work. Ask how the week went and listen, review the training schedule, confirm that email, phone, and other systems are running, and share the projects they'll be part of.
What a finished checklist looks like
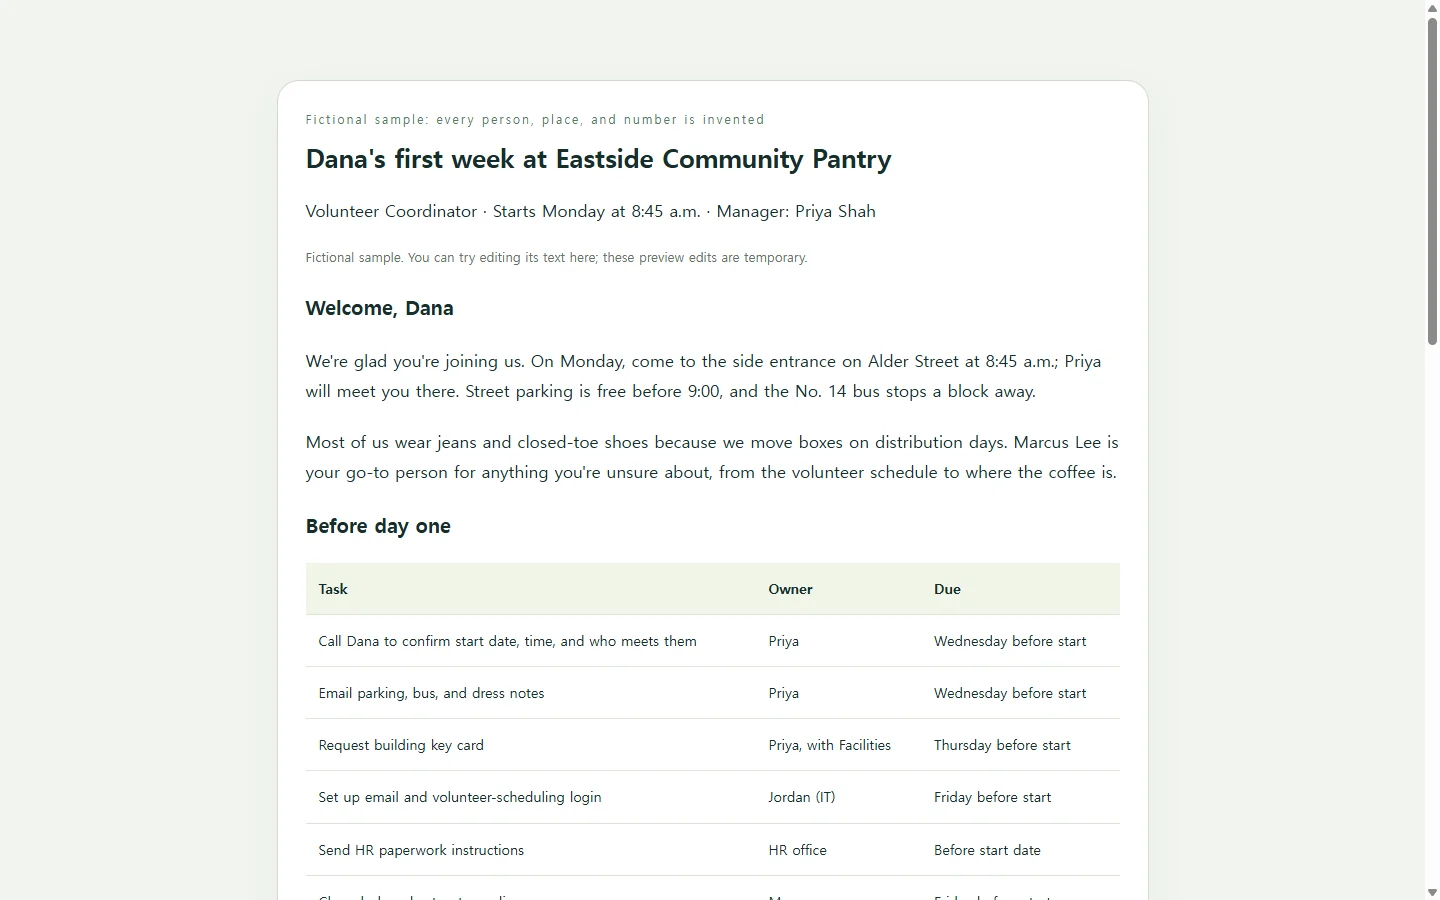
The sample below is fictional: a volunteer coordinator named Dana Ruiz joining a made-up community pantry, with manager Priya Shah and teammate Marcus Lee as the go-to person. Every name, time, and phone extension is invented to show the shape.
Two choices are worth copying. The before-day-one table gives each task an owner and a due day, so ordering the key card belongs to a person instead of floating between departments. And the page opens with a short welcome note that answers the first practical questions: when, where, and who will be at the door.
Notice what it leaves out. It doesn't name tax or eligibility forms, because those depend on your employer and location; it lists HR paperwork with HR as the owner. If HR requires a signed PDF or Word file, submit that. The checklist points people to required forms; it doesn't replace them.
Pick the format that fits who reads it
A spreadsheet works well if you track several hires at once and want to sort by owner. A Word document fits when HR keeps files in a folder. A web page fits when the new hire, a teammate, and IT all need to read the same list on a laptop or a phone without digging for an attachment. None of these is wrong; choose by who has to read it.
Build your own page with AI (optional)
If you'd rather not handle the layout, an AI chat assistant can turn your notes into one HTML file, which is simply a web page saved as a single file that opens in a browser. You supply the facts; the assistant handles structure and styling. Tell it not to invent times, names, or policies, and to leave a visible gap where you don't know something yet.
Copy the prompt below, replace each bracketed part with your own details, and delete any section you don't need.
When the start time moves after you've shared it
Plans shift after the list goes out. Orientation moves from 8:45 to 10:00, or Marcus is out that week and someone else becomes the go-to person. A one-line change like that shouldn't mean asking an AI to rebuild the page.
In NOS, you can edit that text directly on the rendered page, without regenerating it. Once you've published a sharing link, the link stays the same after you edit, so Dana, Marcus, and IT reopen the address they already have and see the new time. Dana doesn't need a NOS account to open it.
Keep the official record wherever your HR team keeps it, and let the shared page be the version everyone reads. When the next change comes, you fix one line instead of sending another attachment.
A prompt to adapt
Create one self-contained HTML file for a new-hire onboarding checklist. Use only the facts I give below. Where a fact is missing, show [TBD] in the page instead of inventing it.

New hire: [first name, e.g., Dana] — Role: [job title, e.g., Volunteer Coordinator]
Manager: [name] — Go-to teammate: [name]
Start: [date] at [time, e.g., 8:45 a.m.] — Arrive at: [entrance or address] — Met by: [name]
Getting there: [parking or transit note, e.g., free street parking before 9:00; bus stop one block away]
What people usually wear: [e.g., jeans and closed-toe shoes]

Sections, in this order:
1. A welcome note of 3–4 sentences that repeats the start details above.
2. Before day one — a table with Task, Owner, and Due columns: [task — owner — due day; one per line]
3. First day — checklist items: [items]
4. First week — one short entry per day: [day — plan], ending with a check-in: [day and who leads it]
5. Who to ask — topic, person, how to reach them: [topic — person — contact]

Requirements:
- Headings in order: one h1 for the page title, h2 for each section.
- Use real checkboxes with visible text labels for first-day items; they are a visual aid only, so add no saving logic.
- On screens narrower than 600px, show each table row as a stacked card so nothing scrolls sideways; tap targets at least 44px tall.
- Body text at least 16px; text-to-background contrast of at least 4.5:1; do not use color alone to show status.
- Inline all CSS. No external scripts, fonts, images, forms, file downloads, or links to outside services.
- Do not add legal forms, policies, benefits, or pay details I didn't list.
- Reply with the complete HTML only.