What the template sections are for
One free Word template for process documentation splits a process into twelve sections, from document control at the top to related documents at the end. That works as a checklist, but the sections don’t carry equal weight for every process.
It helps to read them in three groups. The first says what the document is and who owns it: title, version, owner, review date, a plain-language overview, the roles involved and the inputs needed before work starts. The second is the procedure: numbered steps, the decision points where the path splits, quality checks and an escalation route. The third is support material such as tools, common risks, measures and links to related documents. For a short process, spend most of your time on the second group and keep the others brief.
A sample: volunteer expense reimbursement
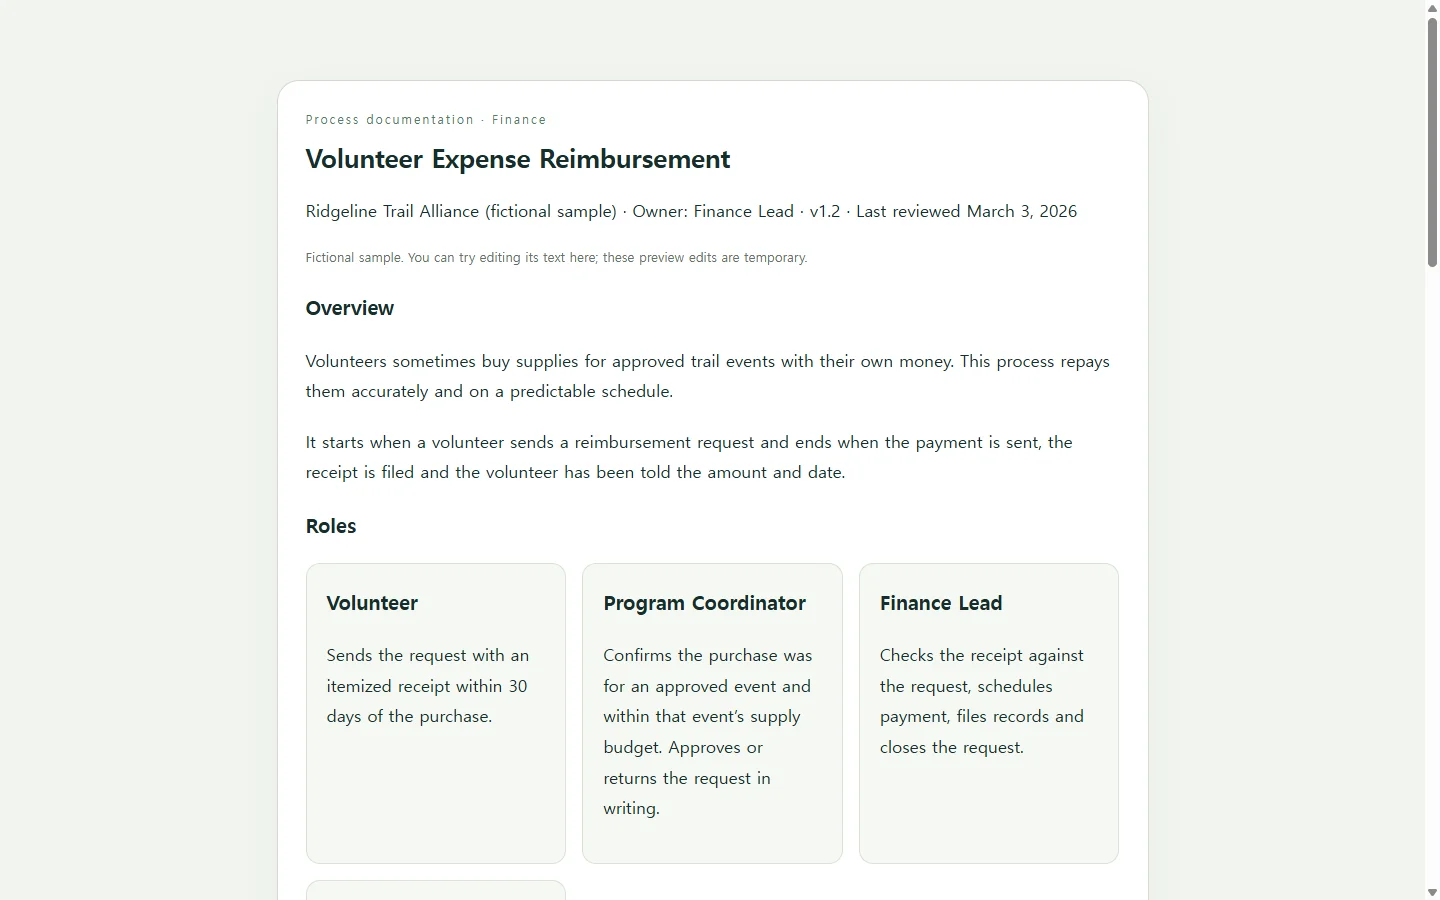
The example on this page documents how a small trail nonprofit repays volunteers who buy event supplies with their own money. The organization, dollar limits, dates and document names are fictional; they exist only to show what filled-in sections look like.
Reimbursement makes a useful sample because it branches: a receipt goes missing, a purchase exceeds the approval limit, a request arrives after the monthly cutoff. As you read it, notice three choices. Roles are written as job titles rather than names, so the page still works after a staff change. Each decision point names a trigger, a response and the person who decides. And the header carries a version and a last-reviewed date, so a reader can tell whether the rules in front of them are current.
Write the exceptions before you polish the steps
You can probably list the main steps of your own process from memory. The gaps show up elsewhere. Before drafting, think back over the last few times the process ran and note each point where someone had to ask, wait or guess; those become your decision points.
Then write each step as one action with an owner and an output: “Finance Lead adds the approved amount to this month’s payment run,” not “payment is processed.” If a step can’t start without a form, a login or an approval, list that under inputs so nobody discovers it halfway through. Keep the overview to a few sentences covering why the process exists, what starts it and what counts as done. That context helps a reader make a reasonable call when something comes up that the page doesn’t cover.
Pick the format by how people will use it
A downloadable Word template is the right choice when the document has to be attached, printed, signed or filed, or when a policy, auditor or funder asks for a DOCX or PDF. In those cases, submit the file they asked for; a link is not a substitute.
A shared document fits when several people edit the text together. A process map is clearer when the flow has many branches that people need to see at a glance. A web page suits the case where the main job is looking something up, such as a volunteer checking the approval limit on a phone, and where you want one address that shows the current version.
Building the page with AI, if you want to
HTML is the format web browsers display, and an AI chat tool can write a complete page from a description, so you don’t need to code. What the tool can’t supply is your process. The roles, limits, deadlines and exceptions have to come from you, which is why the prompt below asks for a visible [TBD] wherever a detail is missing instead of a plausible guess.
When the page comes back, check every name and number against your notes, then open it at phone width and make sure the decision table is still readable. The prompt asks for no forms, scripts or outside connections because a process page only needs to be read.
Keeping one current version after you share it
With the reimbursement page finished, the next step is getting it to the volunteers who submit requests. NOS keeps HTML pages and notes in a workspace, and when you publish a sharing link, recipients can open the page without creating an account.
Processes change after they’re written down. Suppose the board raises the approval limit from $150 to $250, or a new person becomes Finance Lead. In NOS you can edit the rendered text directly, changing the figure or the contact line without asking an AI tool to regenerate the page. The published link stays the same after the edit, so volunteers who saved it don’t need a new address to find the updated limit.
Change the version number and last-reviewed date in the same edit, so readers can see the page was updated on purpose. If you also keep a signed Word or PDF copy for your records, update that file separately; the web page doesn’t replace it. To start your own, list the last few times your process stalled, write those as decision points, and build the rest of the page around them.
A prompt to adapt
Create a single, self-contained HTML file that documents one process as a readable web page.

Use only the details I give below. Where a detail is missing, show the text [TBD] in that spot instead of inventing names, numbers, deadlines or policies.

Process details:
- Process name: [e.g., Volunteer expense reimbursement]
- Organization: [e.g., Ridgeline Trail Alliance]
- Owner (job title, not a person’s name): [e.g., Finance Lead]
- Version and last-reviewed date: [e.g., v1.2, reviewed March 3, 2026]
- Purpose, what starts the process, and what counts as done (2–3 sentences): [your text]
- Roles and what each one does or decides: [e.g., Volunteer – submits the request; Program Coordinator – confirms the purchase was for an approved event; Finance Lead – checks receipts and pays]
- Inputs needed before work starts: [e.g., itemized receipt, event name, amount, payment details on file]
- Numbered steps, each with owner and output: [your steps]
- Decision points as trigger → what to do → who decides: [e.g., No receipt → volunteer signs a missing-receipt note → Finance Lead; Over $150 → hold and send to Executive Director → Executive Director]
- Quality checks before the process is closed: [your checks]
- Escalation (role and how to reach them): [your text]
- Related documents (exact names): [your list]

Layout:
- One h1 title, then a short header line with owner, version and last-reviewed date.
- h2 sections in this order: Overview, Roles, Inputs, Steps, Decision points, Quality checks, Escalation, Related documents. Leave out any section I left completely empty rather than padding it.
- Steps as an ordered list. Decision points as a table with a caption and real header cells: Trigger, What to do, Who decides.
- Put a one-line note at the bottom stating who maintains the page.

Technical and accessibility requirements:
- Inline CSS only. No JavaScript, no external fonts, images, stylesheets or scripts, no links to APIs, and no forms, inputs or buttons that submit data.
- Semantic HTML with lang="en" on the html element and headings in order.
- Body text at least 16px, line height around 1.5, and text/background contrast of at least 4.5:1. Do not rely on color alone to mark anything.
- Readable on a 375px-wide phone with no horizontal page scrolling. If the decision table is too wide, let only the table scroll horizontally inside its own container, or stack each row as a labeled card.
- Return only the complete HTML file in one code block, with no explanation before or after.