In short
Put the yield, ingredient list, and method at the top. Leave the personal story out of the path to the recipe.
Use clear serving controls only when every measured ingredient changes with them.
Give the cook a clean phone view and a print option, then test both before sharing.
The NOS Team built one fictional recipe page to test this structure. The page opens with the yield, prep and cook labels, a serving selector, the ingredient checklist, and five numbered steps. There is no biography, travel memory, or long introduction between the title and the food.
Our example is Lemon Chickpea Orzo. The dish and every detail are fictional, so the exercise stays focused on page design rather than a claim about a real cook or tested publication.
What should a recipe website without stories show first?
A cook usually needs four things before starting: how much the recipe makes, what to gather, what order to follow, and whether any step needs attention before the pan is hot. Put those items in that order.
- Recipe name and yield. Make the dish identifiable and state the starting number of servings.
- Ingredients with units. Keep each item on its own line so it can be checked at a glance.
- Numbered method. One action group per step is easier to resume after looking away.
- Useful controls. Scaling, checkboxes, and printing should support cooking rather than delay it.
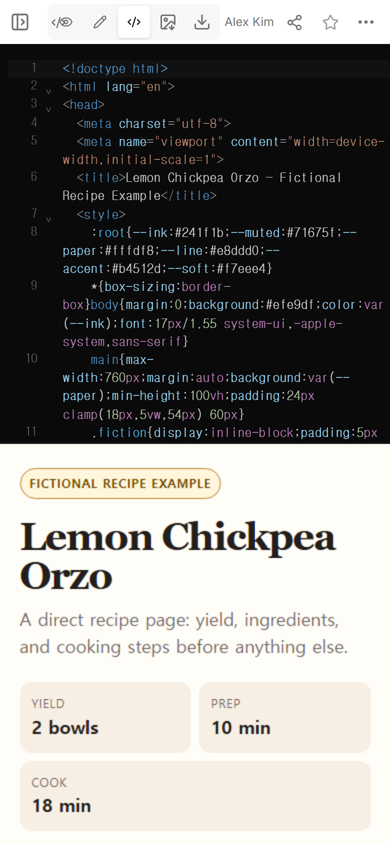
The source and preview appeared together in Code view. That made the first check simple: the fictional-example label, recipe name, and two-serving yield all appeared in the rendered page.
How did we make the recipe easy to scan?
We used a narrow reading column, large section headings, and a pale facts panel. The first phone screen contains the title, the yield, the two time labels, and the serving choices. Ingredients begin immediately below.
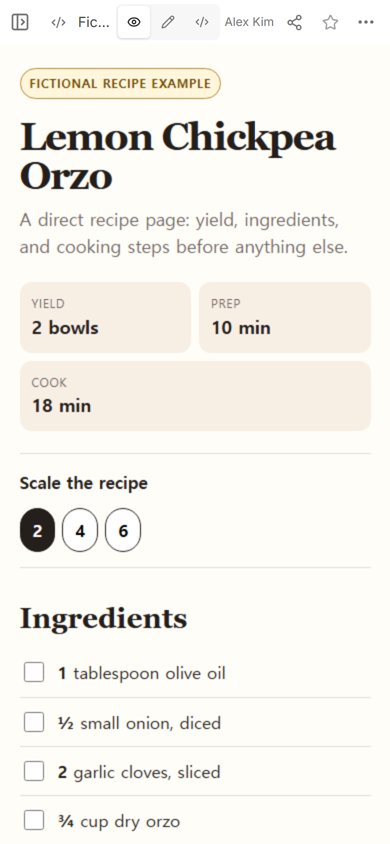
The ingredient list uses one row per item. Checkboxes are optional: they help someone track what has been gathered, but the text still makes sense when no box is touched. Decorative photography was left out because it would push the working information farther down the screen.
The page also avoids a sticky overlay, newsletter prompt, and automatic pop-up. Those elements were not needed to complete this one task.
How should recipe serving sizes work?
A serving control is useful only when it changes both the stated yield and the measured ingredients. A button that changes “2 bowls” to “4 bowls” while leaving one tablespoon of oil behind would create a dangerous mismatch.
We opened the public page at its two-bowl setting, then selected 4. The yield changed to four bowls. One tablespoon of oil became two, half an onion became one, and two garlic cloves became four.
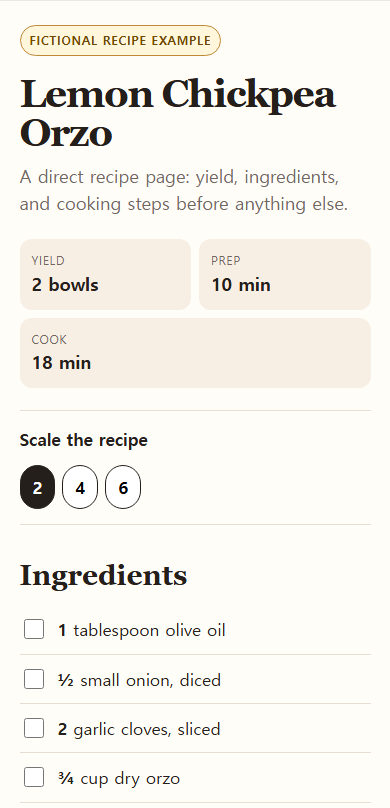
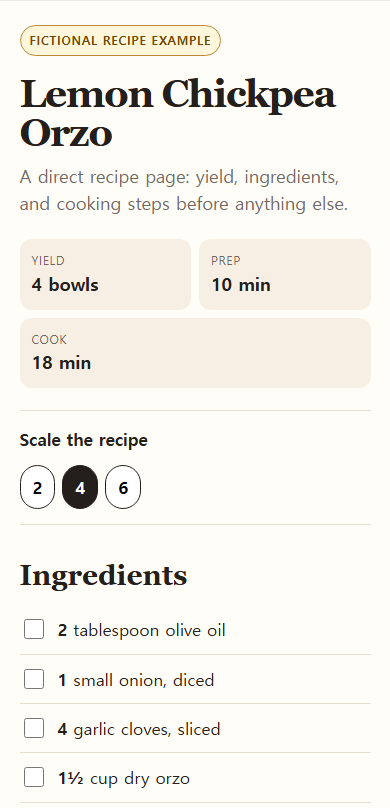
Keep descriptive amounts such as “to finish” outside the calculation. Pepper and parsley do not need a fake number simply because the other lines scale.
What belongs in the cooking steps?
Write actions in the order they happen. Begin each item with the verb the cook needs: warm, add, pour, fold, divide. Put a condition in the same step as the action it controls, such as simmering until the orzo is tender.
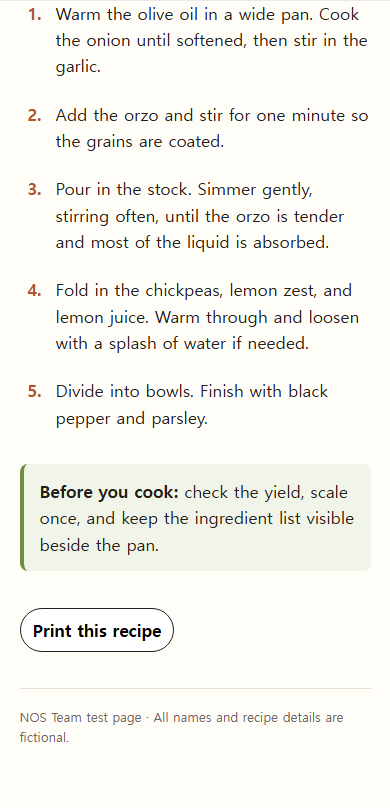
The public capture showed all five steps, the preparation note, and the print button. We did not claim a printed result because this run only confirmed that the control was present on the live shared page.
If you are planning several dinners rather than publishing one recipe, a weekly meal planner is the better next page. It organizes days and a shopping list; this page stays with one dish.
How do you share a no-story recipe page?
After the recipe was readable in View, we opened Share on the same NOS page. The panel displayed an anyone-with-the-link address and stated that people with the link can read without signing in and cannot edit the page.
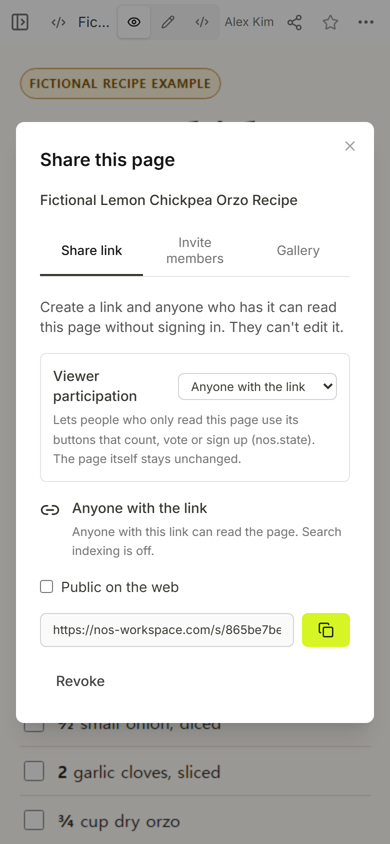
Open the address outside the editor before sending it. This catches a common mistake: reviewing the owner view while the reader receives a different address. The HTML to Link tool covers that handoff in more detail.
We also opened Edit on the existing page to confirm where a correction would begin. We did not change or save recipe text during that capture.
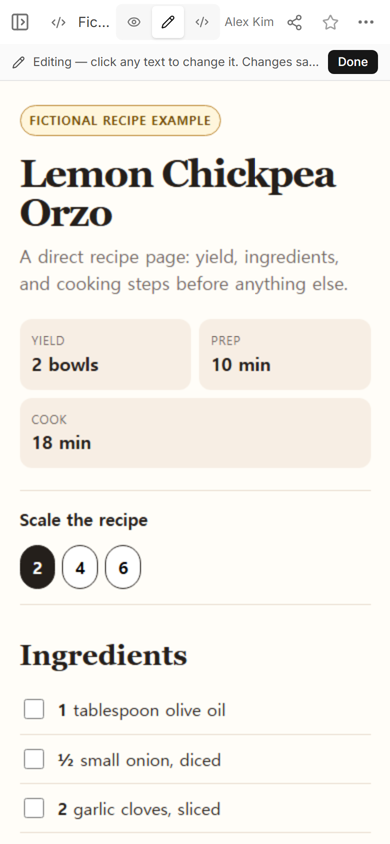
For a small wording correction, read Edit HTML Without Coding before replacing the whole page. Recheck the public address after any saved change.
What was the most useful check?
The serving control exposed the easiest mistake to miss. The selected number, yield, and quantities have to tell the same story. Looking only at the button style would not have proved that the ingredients changed.
Another useful check was the bottom of the page. A recipe can look tidy at the top and still bury a step, clip a note, or place the print control where it is hard to find. Scrolling through the public address showed the complete method and footer.
You can download the complete fictional recipe example prepared for this guide. It is a self-contained file for inspection and adaptation; it is not a nutrition or food-safety reference.
When not to do this
Do not use one static recipe page as a substitute for a searchable recipe collection, member accounts, saved personal cookbooks, grocery delivery, or a nutrition database. Those jobs require stored data and a larger service.
Do not add automatic quantity changes when the conversion cannot be reviewed. Scaling a sauce is straightforward; changing pan size, baking time, or food-safety guidance is not the same calculation. For those cases, write separate tested instructions instead of implying that one button solved them.
Where NOS fits
NOS held the finished recipe, showed it in View, opened its Edit mode, and produced the share panel used in this guide. The public address displayed the same fictional page on a phone-sized screen. This local article package prepares the images and copy only; it does not publish the guide to the NOS Learn site.