In short
Give every fixture its own row keyed by position and unit number. Add the channel, stage target, beam edge, and anything the light must miss. At the focus call, write what you actually saw beside the plan. If a unit needs another look, keep it open until someone checks the new edge.
Download the blank focus chart (CSV)
Download the completed Paper Moon example (HTML)
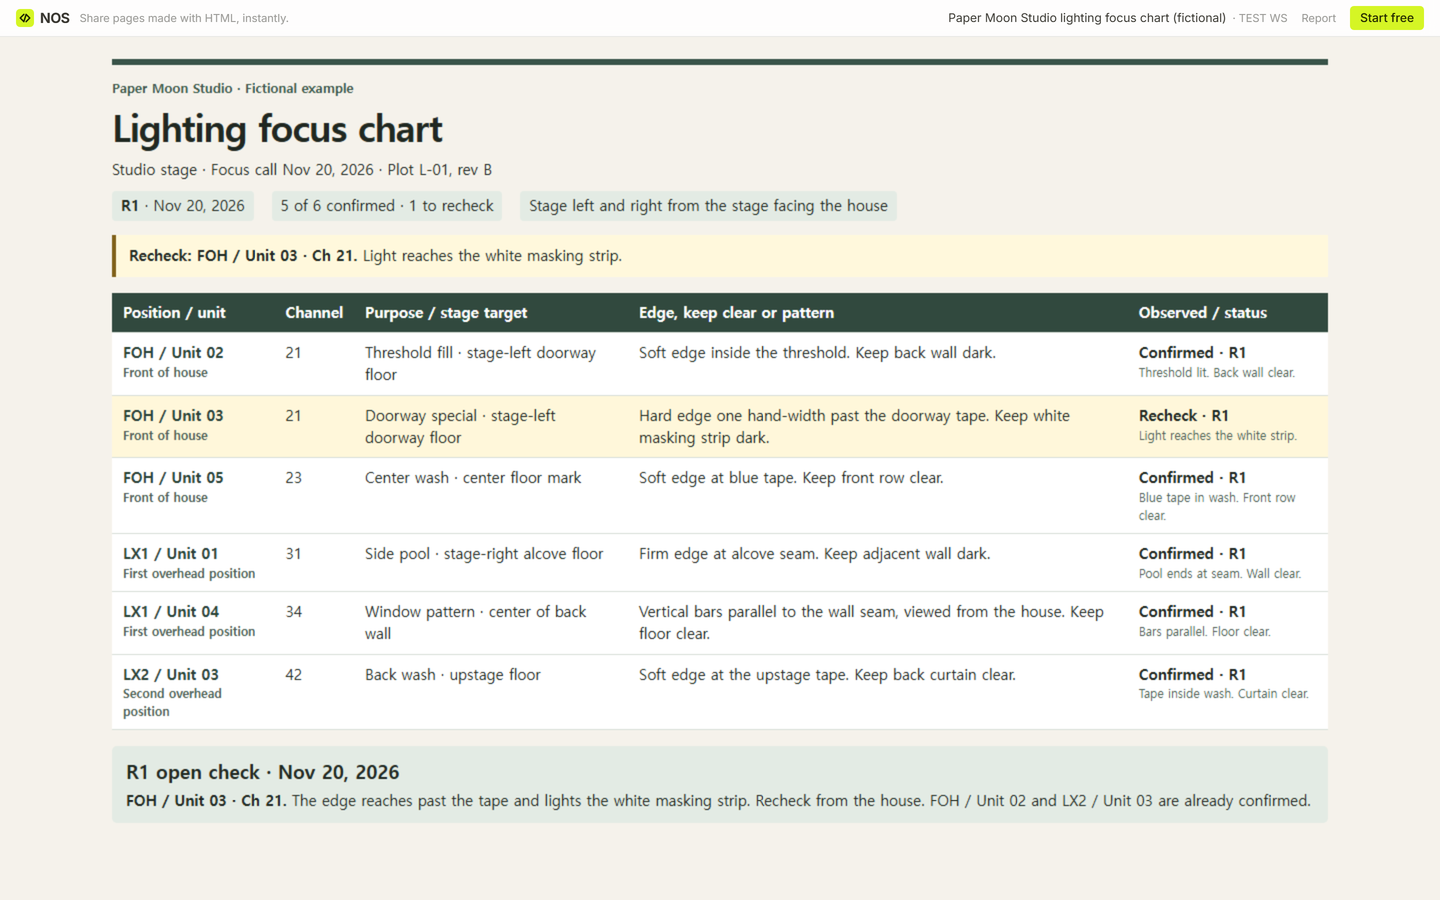
Open the CSV in a spreadsheet and copy the Planned row for each fixture. The completed HTML example opens in a browser. It contains six fictional fixtures from one focus call at Paper Moon Studio, including the note that explains why Unit 03 needed another look.
Which Unit 03 are we checking?
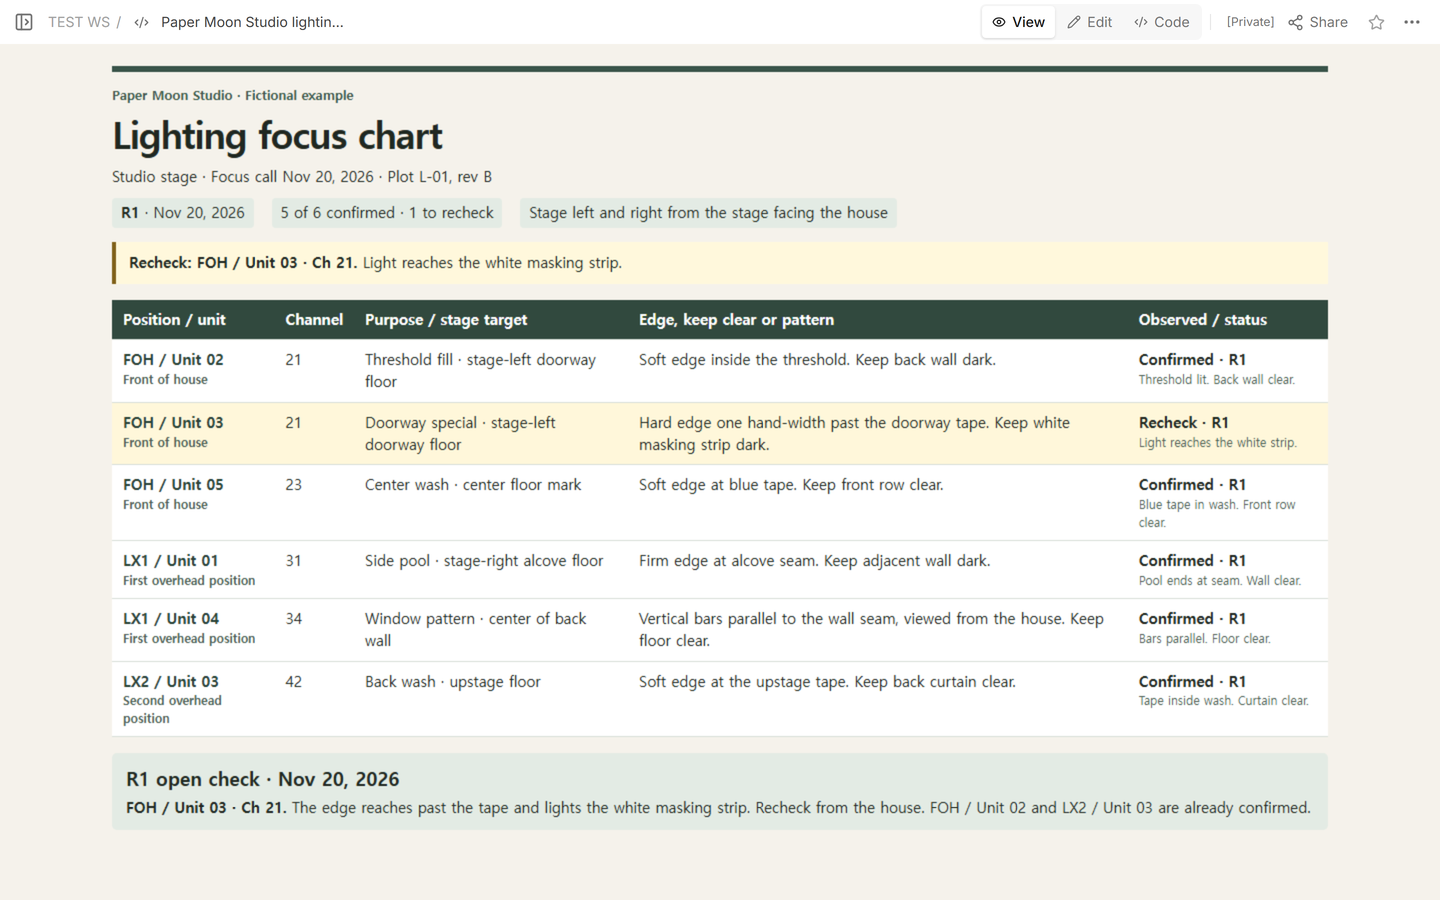
The first page we shared showed a narrow beam spilling onto a white masking strip beside the stage-left doorway. Two fixtures light that threshold and both use Channel 21. The soft fill is FOH / Unit 02. The sharper doorway light is FOH / Unit 03. There is also a Unit 03 on LX2, over the stage, with a different target. Writing “recheck 21” or “fix Unit 03” leaves someone with a choice the note could make for them.
Start each row with the position and unit number exactly as they appear on the current plot. Put the control channel in its own column. For this chart, FOH means front of house and LX1 and LX2 name the two overhead positions. The header also states the convention for left and right so the person reading from the house can use the same stage directions as the person onstage.
What belongs in each focus row?
Give the light a job and a place. “Doorway special” is its job. “Stage-left doorway floor” tells the person checking it where to look. Then name the boundary that makes the result recognizable. In the example, the doorway tape sets the hard edge and the white strip is the surface to keep dark. For the window pattern on LX1 / Unit 04, the bars run parallel to the wall seam when viewed from the house. Leave the pattern field blank when the fixture has no pattern.
The Toronto Metropolitan University production handbook places focus notes at the hang and focus call and cue setting in a later stage of its process. The designer's production materials at Theatre Lighting Workshops distinguish the fixture's position from the focus position and use a focus note to name the stage area or purpose. The blank chart puts those references next to the boundary and the observed result so the focus lead can read the plan and the check side by side.
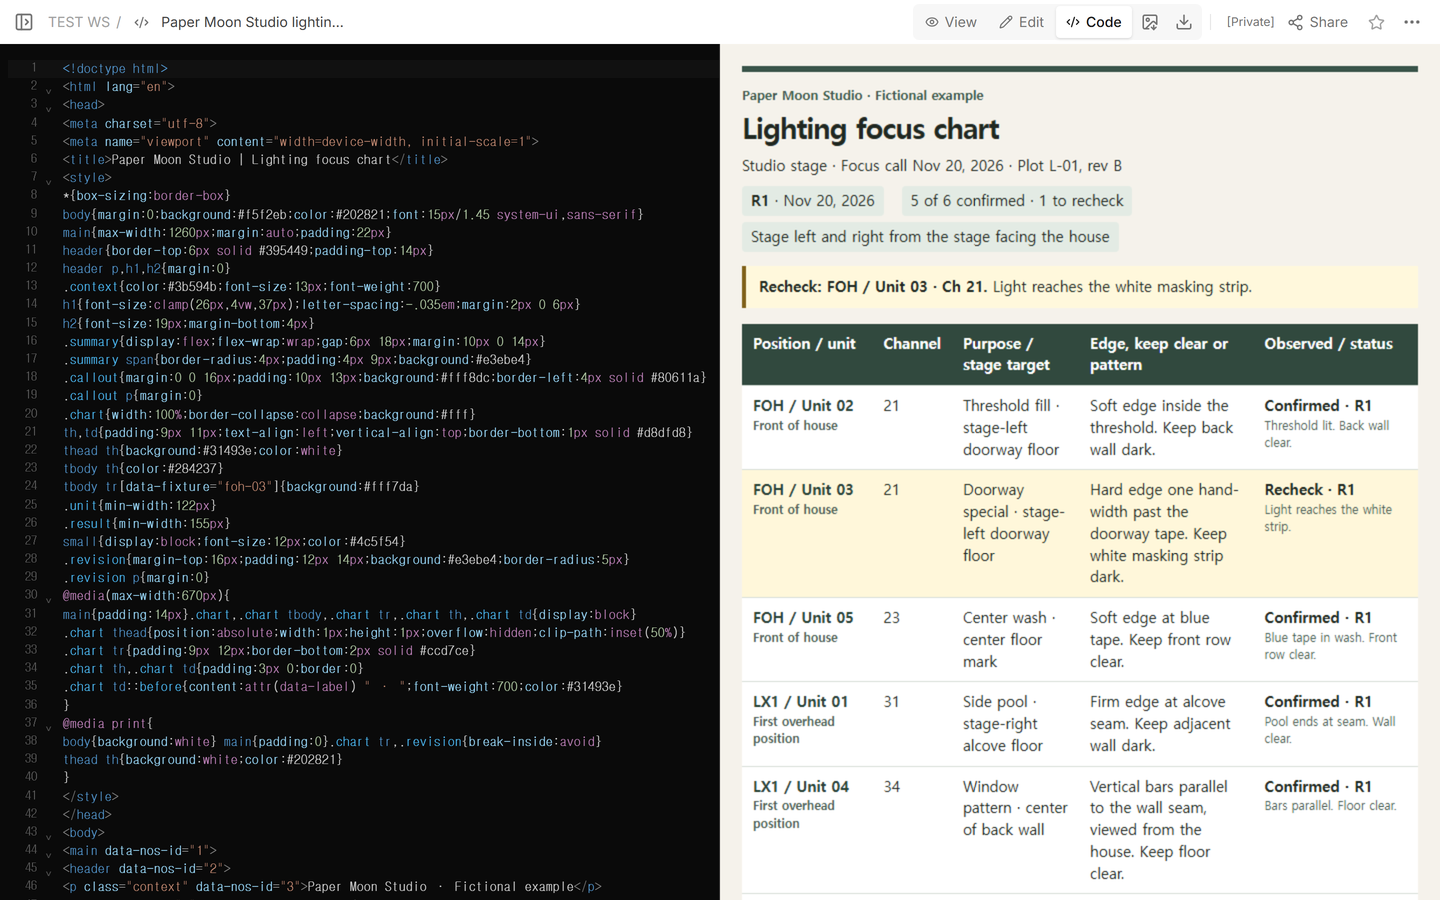
How do you write a recheck someone can pick up?
Keep the planned boundary and the observation in separate fields. The first revision of the sample says the light can extend one hand-width past the doorway tape. The check says that allowance puts light on the white strip. Mark the row Recheck and describe what the next person should look for from the house. Reserve Confirmed for a result someone has seen. A row that has yet to be checked stays Planned.
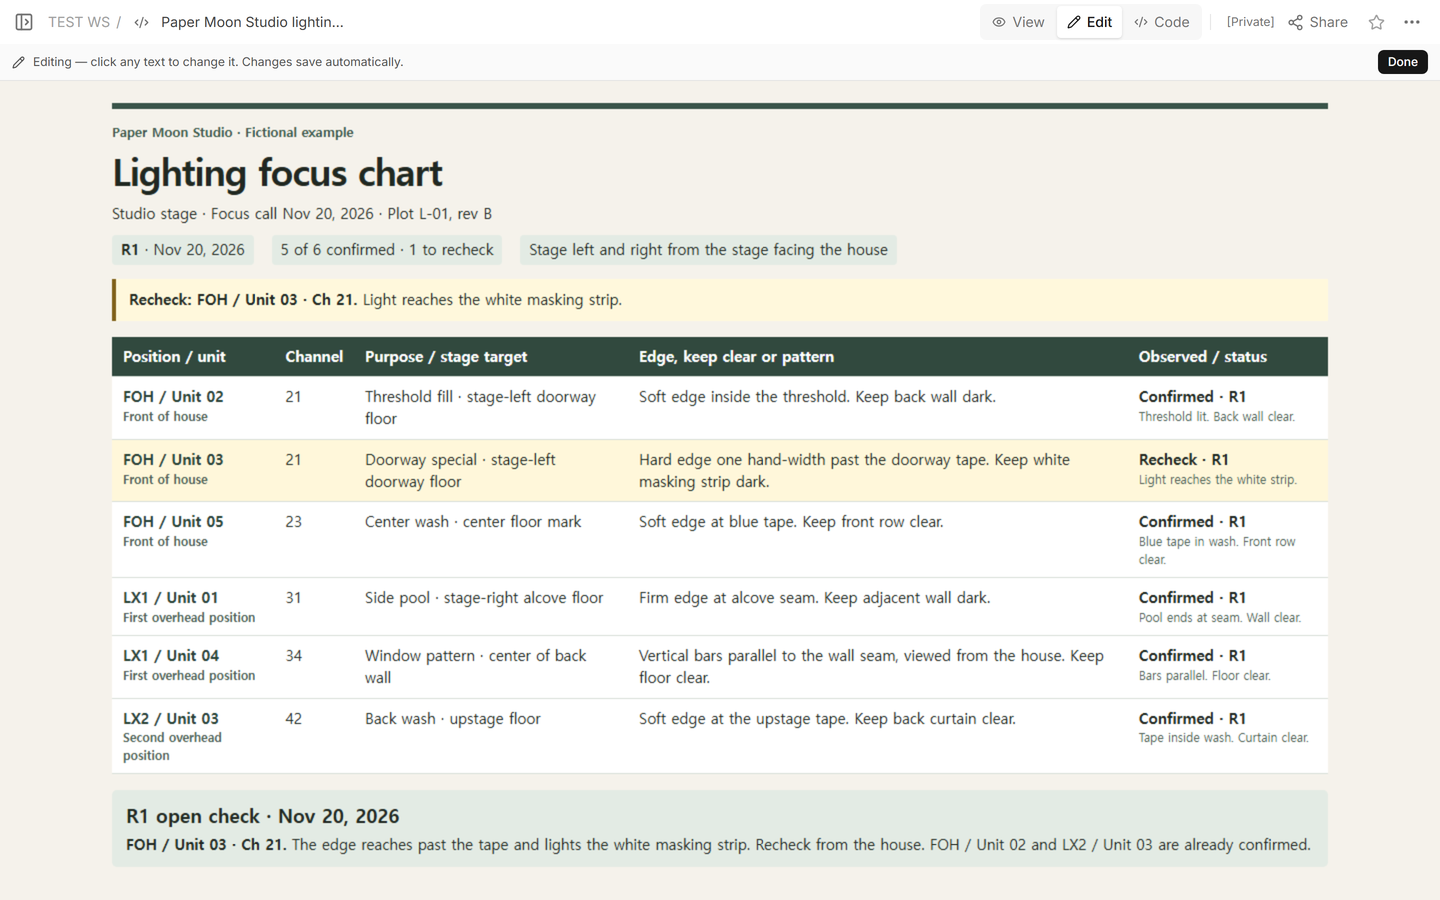
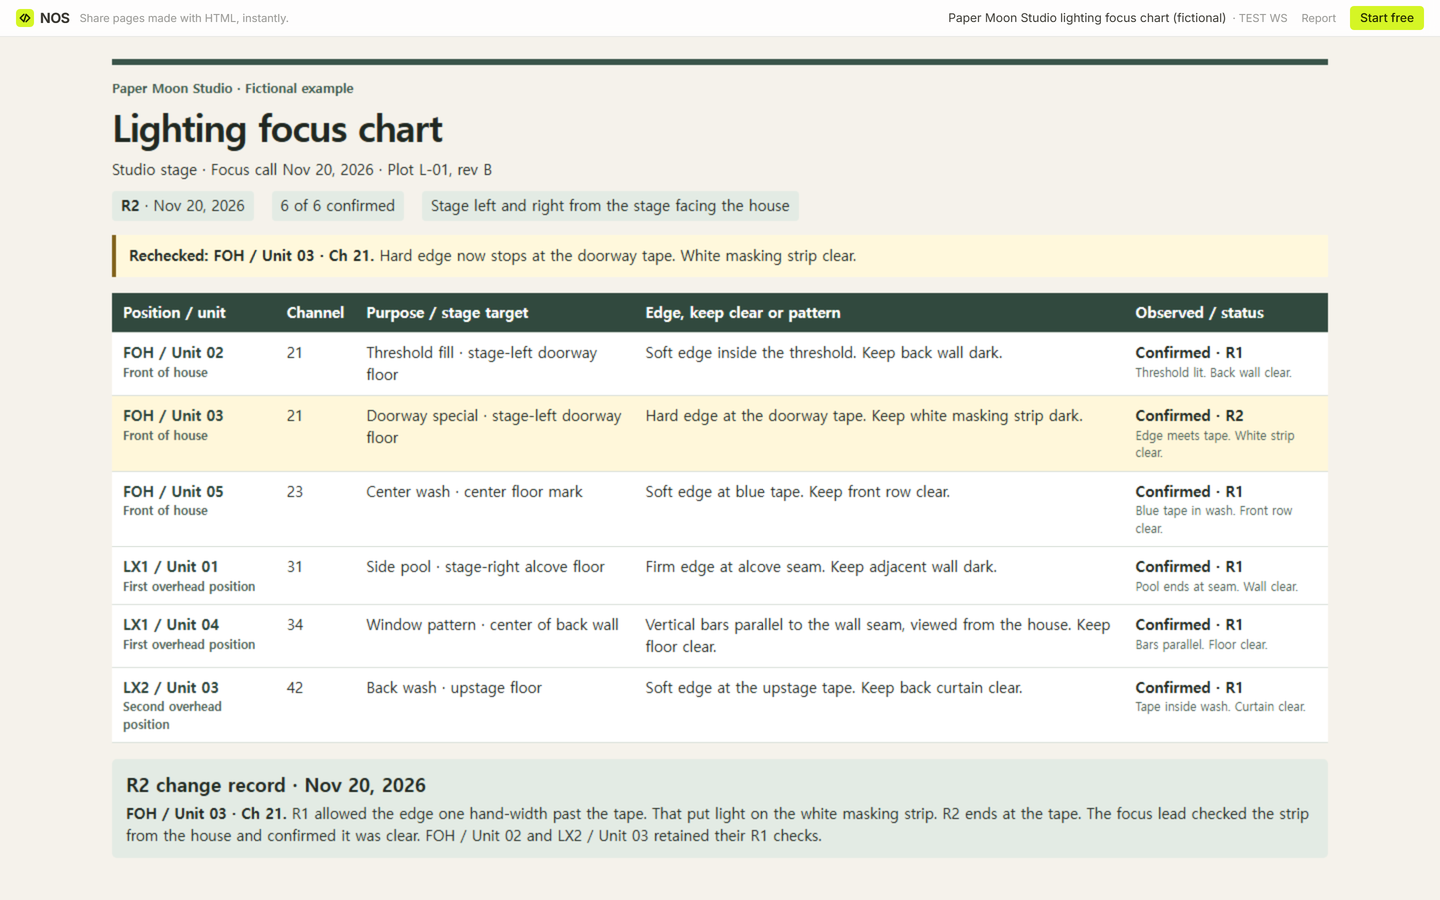
In the fictional recheck, the edge stops at the tape and the white strip stays dark. Revision R2 gives FOH / Unit 03 that new boundary and records what the focus lead saw. The change note carries the date, full fixture identifier, previous allowance, and reason. FOH / Unit 02 and LX2 / Unit 03 still carry their R1 results. Their rows give the next reader a quick way to see the scope of the change.
When not to do this
Use the venue's own records for installation, rigging, electrical work, or safety sign-off. Use a lighting cue sheet for cue order and timing. The stage manager rehearsal report is a better home for a department request raised during rehearsal. For distributing call sheets and revised production documents, see the production file handoff guide.
How did the revised chart reach readers?
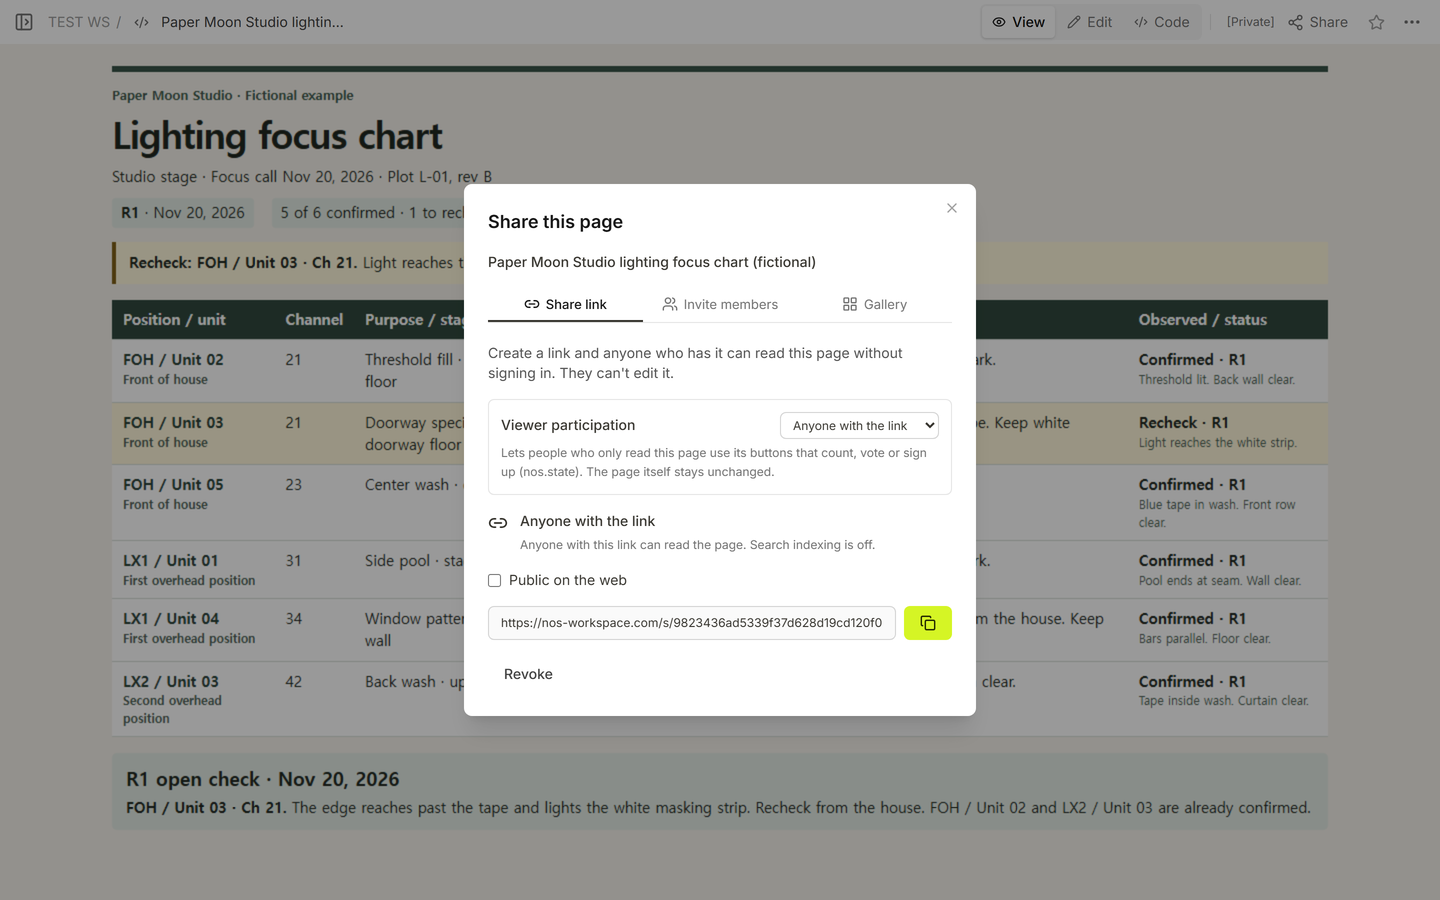
We used NOS Workspace to share the fictional chart and updated the existing page for R2. Share showed an anyone-with-the-link reader address. We opened that address signed out before the update and again afterward. The Paper Moon reader example now shows the tape as the new stopping point and the strip as clear. A crew member opening the chart can check the revision at the top, then read the dated entry for the fixture.