Put scenes down the left and pack numbers across the top. Write one wearer per pack, then log each change with a scene boundary, pack number, giver, and receiver. Take the corrected matrix and the handoff list to the print dialog together.
Where can I download the mic plot?
Download the filled mic plot · Download the blank mic plot · Open the worked example
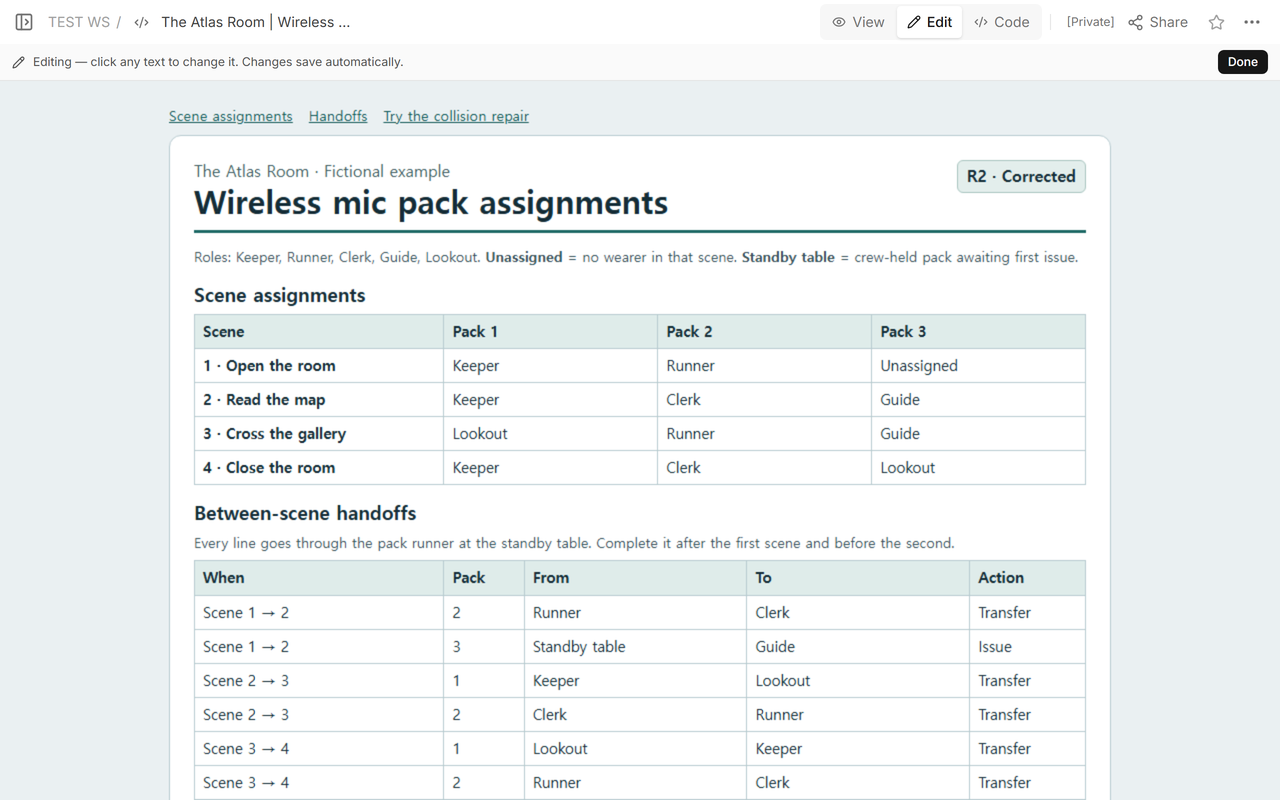
The filled sheet follows five fictional roles through four scenes of The Atlas Room with three packs. Its handoff list sits directly below the scene table. Open either download in a browser to print it, or select Save as PDF in the print dialog to keep a copy. The practice exercise stays off the printed sheet.
How do you build a scene-by-scene mic plot?
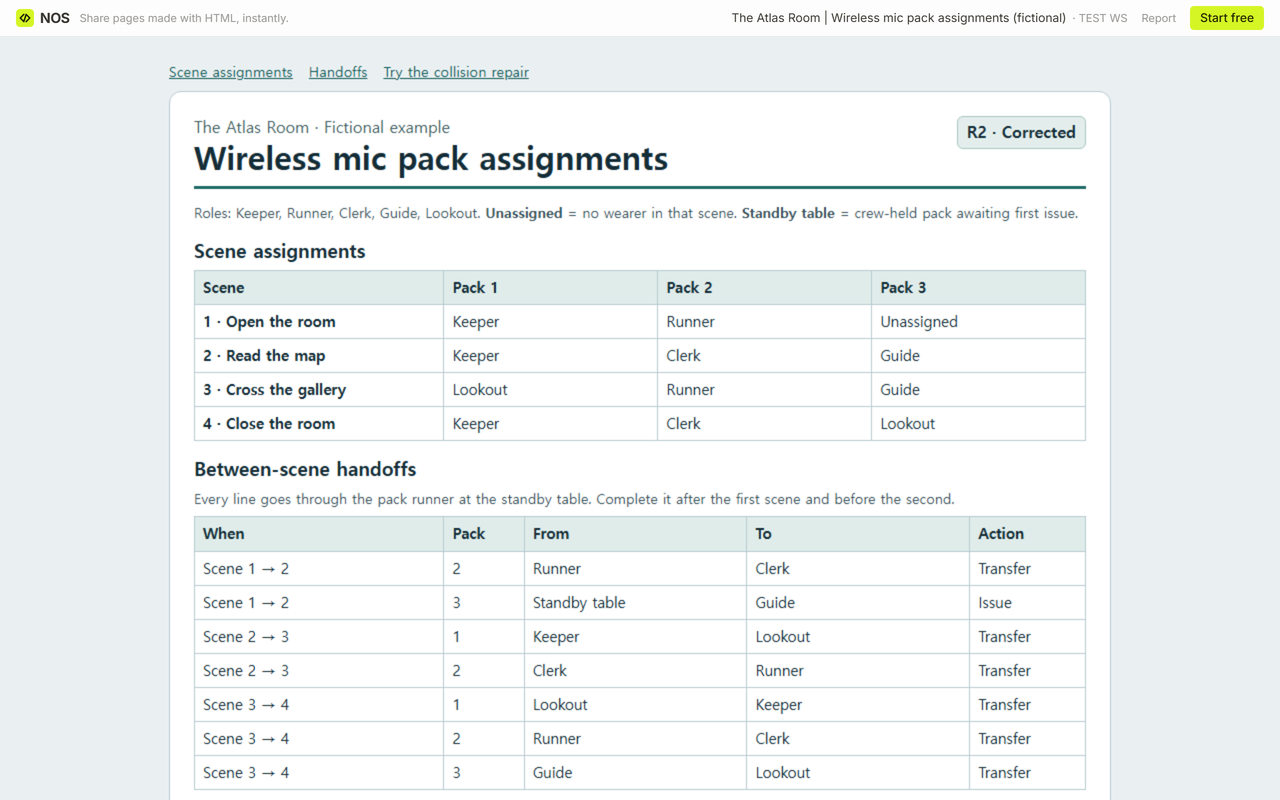
List the roles that need a pack in each scene before you fill the grid. Label columns with the pack IDs your crew uses. At each scene, read across the row to check that every required role appears exactly once. Keep a role on the same pack across adjoining scenes when the plan allows it. In the sample, Keeper stays on Pack 1 from Scene 1 to Scene 2 and Guide stays on Pack 3 from Scene 2 to Scene 3.
Give unused slots a label. In Scene 1, Pack 3 reads Unassigned, and the handoff list identifies the standby table as the place it starts. A blank box in your working copy still needs a decision. Theatrecrafts’ radio mic plot example also puts numbered mics across the top and marks changes at scene or interval boundaries.
How do you catch a double booking?
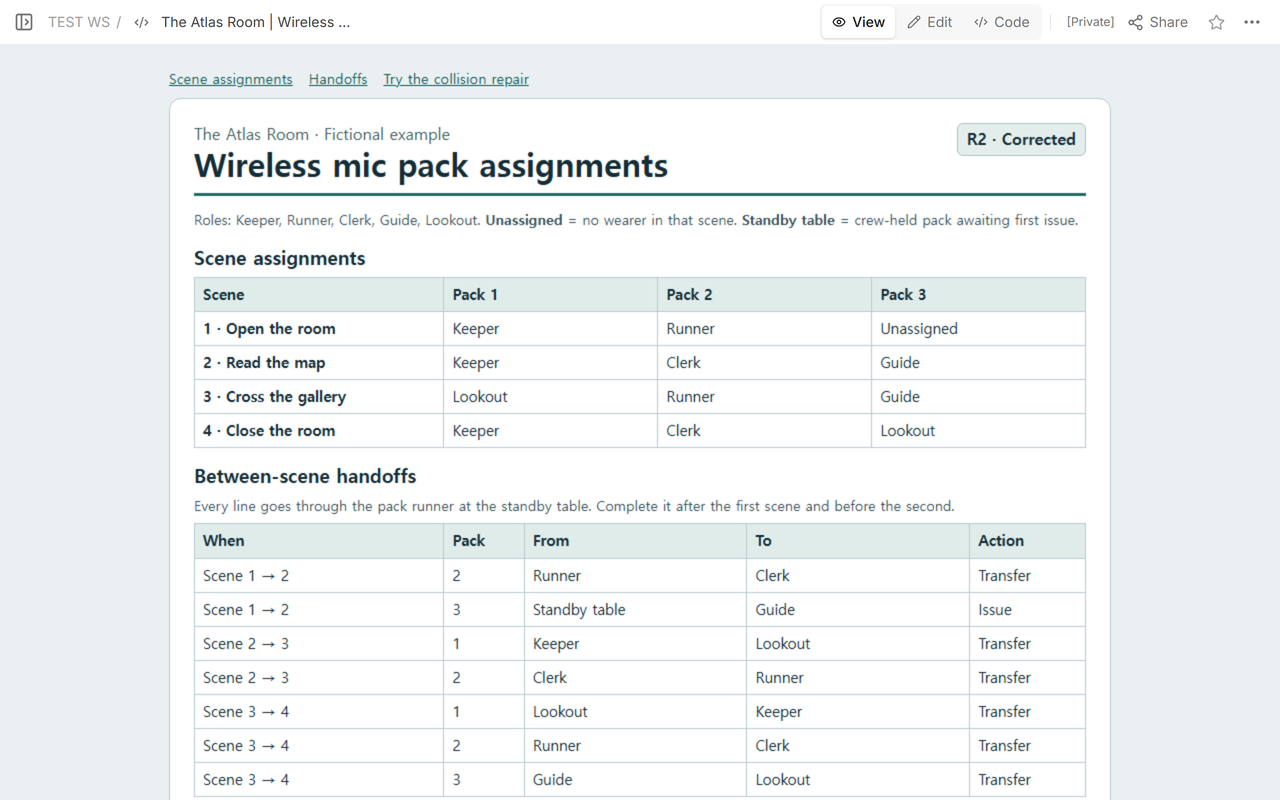
In our Scene 3 draft, Lookout and Runner both got Pack 2. The row needed three distinct assignments. Guide already had Pack 3 and Pack 1 was free for that scene, so we moved Lookout to Pack 1. That left Runner on Pack 2 and Guide on Pack 3. Open Try the Scene 3 collision repair in the example and select Move Lookout to Pack 1 to check the corrected row.
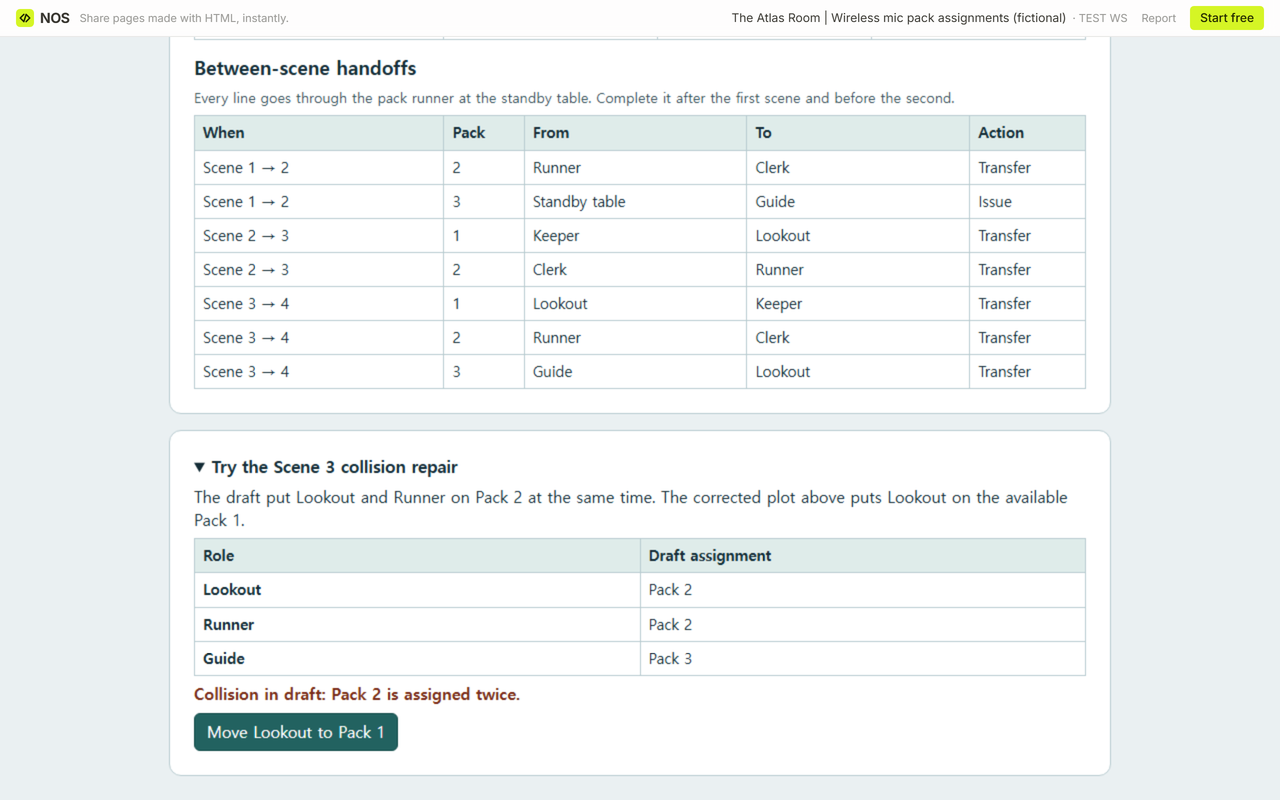
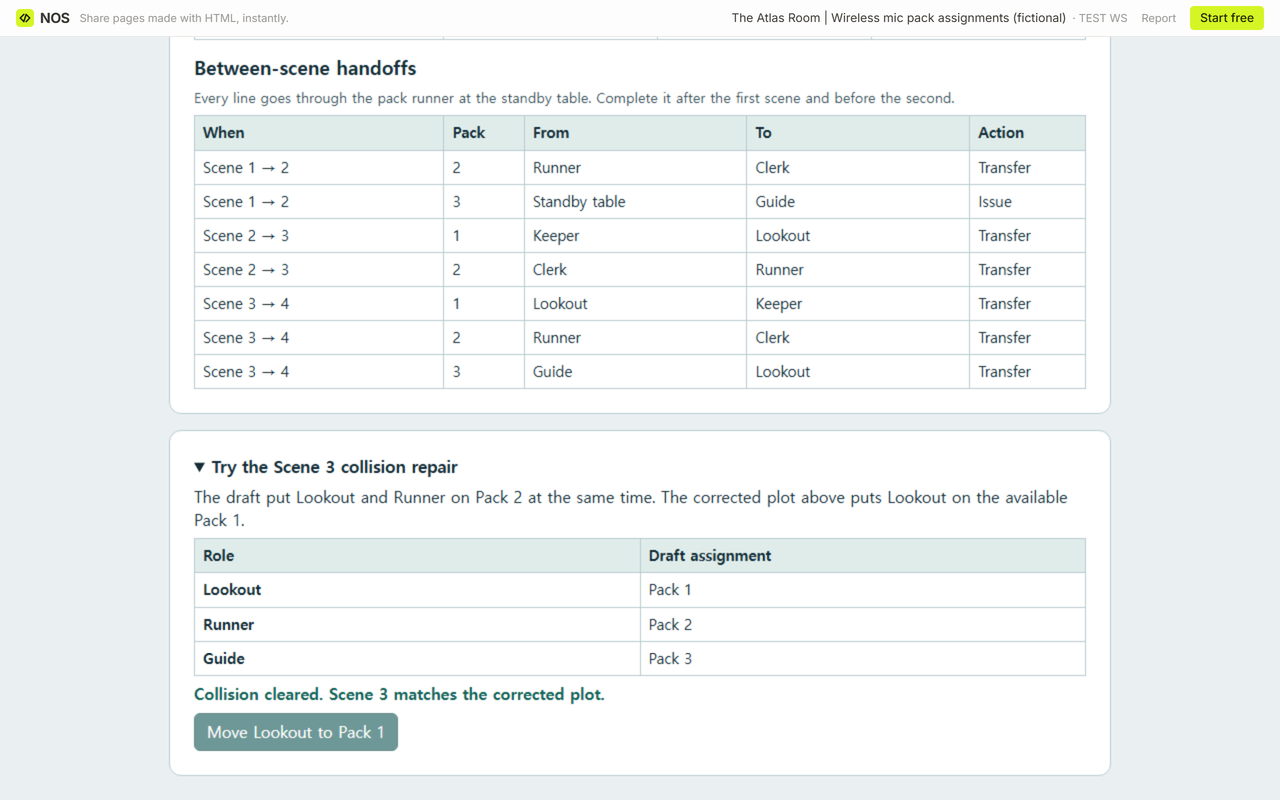
If every pack already has a wearer, mark the conflict and revisit the scene’s requirements and assignments with your team. Leave the conflict visible until you can account for each required role.
Who hands over each pack, and when?
Compare neighboring rows one pack at a time. For each change, write the two scenes, the pack ID, the outgoing holder, and the incoming holder. In this example, the outgoing holder hands the pack to the pack runner at the standby table, and the incoming holder collects it there before the next scene.
- After Scene 1, before Scene 2: Pack 2 goes from Runner to Clerk. The pack runner issues Pack 3 from the standby table to Guide.
- After Scene 2, before Scene 3: Pack 1 goes from Keeper to Lookout. Pack 2 goes from Clerk to Runner.
- After Scene 3, before Scene 4: Pack 1 goes from Lookout to Keeper, Pack 2 from Runner to Clerk, and Pack 3 from Guide to Lookout.
Check both sides of the correction. Lookout receives Pack 1 going into Scene 3 and gives it back going into Scene 4. Six role-to-role transfers and one first issue account for all seven changes in the chart.
How do you keep a clean copy?
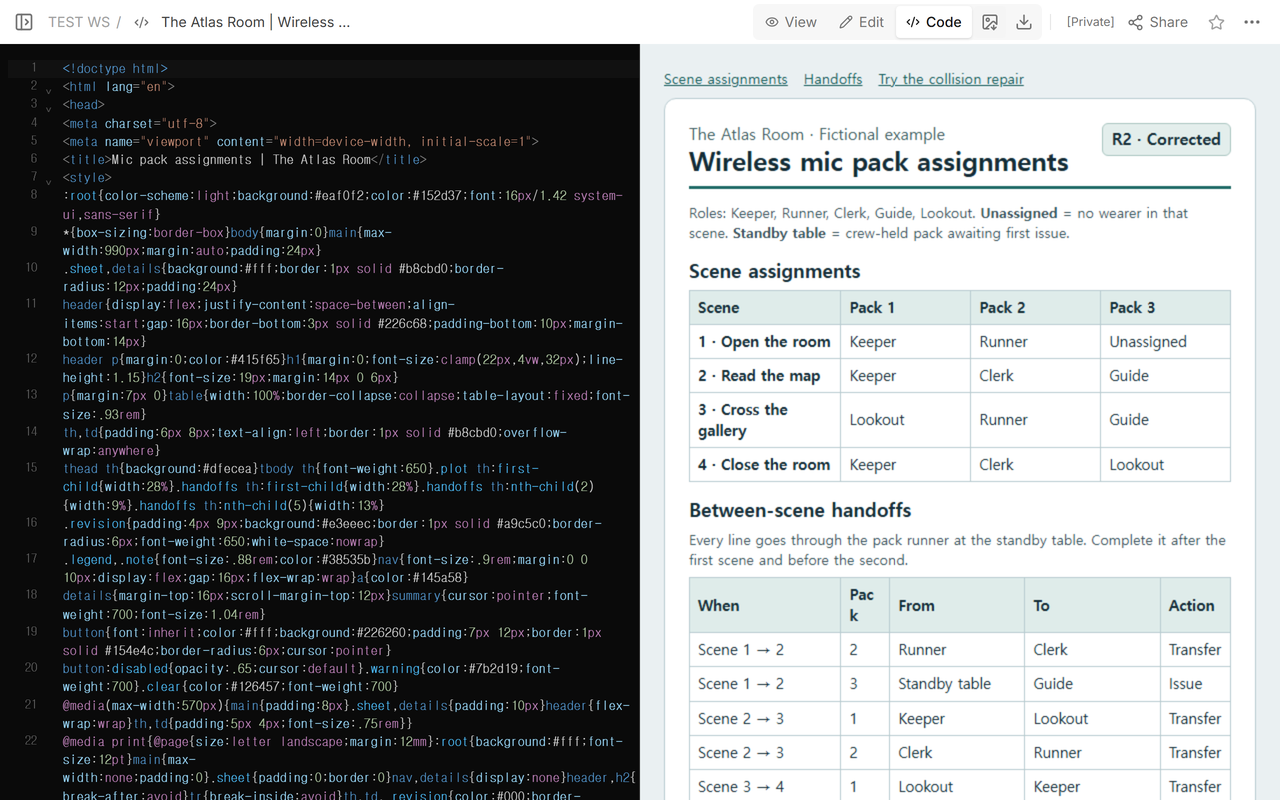
Duplicate the blank HTML file before filling it. Type in the cells, then print or save to PDF before you close the tab to keep your entries. The blank file also works as a paper form. Add your production name, revision date, and the handoff point. If a scene change has a more specific trigger, such as the end of a blackout, add that trigger in the When column. Check print preview for both tables and the edition label.
When not to do this
Use this sheet for scene assignments and transfers. Keep the rest of the sound paperwork in the production’s documents. USITT and TSDCA’s documentation guide separates performer tracking from mic tracking. Michigan Tech’s theatre sound paperwork guide lists wireless tracking separately from the patch plot and mic input list.
How can the crew open the same sheet?
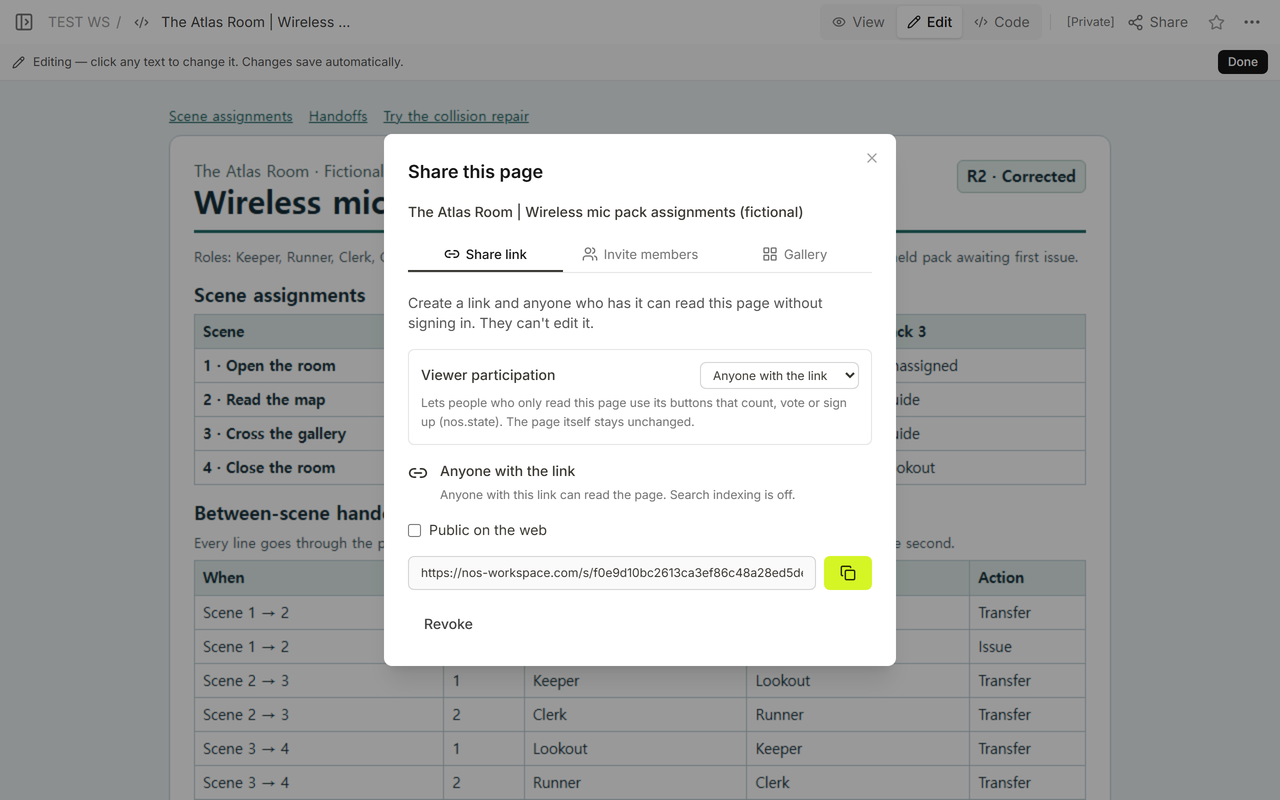
We found the reader link for the Atlas Room sheet in NOS Workspace’s Share panel. We opened that link in a signed-out browser and could see the chart. Send the reader address for the edition you checked and put the same revision label on copies people will carry backstage.
Use the theatre props list to follow stage objects from preset to return. Record what actually happened at a rehearsal in the stage manager’s rehearsal report.