The way to put an AI-made HTML activity into a Moodle course is to host the page at a web address and add that address as a URL resource.
Pasting the code into a Moodle text box is the route that usually fails: the editor cleans what it receives, and the scripts that make the page interactive are the part at risk.
Here is the kind of page this is about. Try the quiz, then read on for how it gets into a course.
<!doctype html>
<html lang="en">
<head>
<meta charset="utf-8">
<meta name="viewport" content="width=device-width, initial-scale=1">
<title>Water cycle check</title>
<style>
  * { box-sizing: border-box; }
  body { margin: 0; padding: 16px; font-family: system-ui, sans-serif; background: #f4f6f9; color: #1d2330; }
  .wrap { max-width: 560px; margin: 0 auto; }
  h1 { font-size: 20px; margin: 0 0 4px; }
  .sub { margin: 0 0 14px; color: #5b6472; font-size: 14px; }
  .q { background: #fff; border: 1px solid #e1e4ea; border-radius: 10px; padding: 12px 14px; margin-bottom: 10px; }
  .q p { margin: 0 0 8px; font-weight: 600; font-size: 15px; }
  label { display: block; padding: 7px 8px; border-radius: 6px; font-size: 15px; cursor: pointer; }
  label:hover { background: #f0f3f8; }
  .q.right { border-color: #86c79a; background: #f4fbf6; }
  .q.wrong { border-color: #e7a58f; background: #fff7f5; }
  .note { margin: 6px 0 0; font-size: 13px; color: #5b6472; display: none; }
  .q.right .note, .q.wrong .note { display: block; }
  button { font: inherit; font-weight: 600; padding: 10px 18px; border: 0; border-radius: 8px; background: #1d4ed8; color: #fff; cursor: pointer; }
  button.ghost { background: #e5e8ee; color: #1d2330; margin-left: 6px; }
  #score { margin: 12px 0 0; font-size: 16px; font-weight: 700; min-height: 22px; }
</style>
</head>
<body>
<div class="wrap">
  <h1>Water cycle: quick check</h1>
  <p class="sub">Three questions. Pick one answer each, then press Check.</p>

  <div class="q" data-answer="b">
    <p>1. What turns liquid water into vapour?</p>
    <label><input type="radio" name="q1" value="a"> Condensation</label>
    <label><input type="radio" name="q1" value="b"> Evaporation</label>
    <label><input type="radio" name="q1" value="c"> Precipitation</label>
    <div class="note">Evaporation: heat turns liquid water into vapour.</div>
  </div>

  <div class="q" data-answer="c">
    <p>2. Clouds form when vapour...</p>
    <label><input type="radio" name="q2" value="a"> warms up and rises forever</label>
    <label><input type="radio" name="q2" value="b"> turns into ice on the ground</label>
    <label><input type="radio" name="q2" value="c"> cools and condenses into droplets</label>
    <div class="note">Condensation: cooling vapour becomes tiny droplets.</div>
  </div>

  <div class="q" data-answer="a">
    <p>3. Rain, snow and hail are all called...</p>
    <label><input type="radio" name="q3" value="a"> precipitation</label>
    <label><input type="radio" name="q3" value="b"> evaporation</label>
    <label><input type="radio" name="q3" value="c"> runoff</label>
    <div class="note">Precipitation: water falling from clouds.</div>
  </div>

  <button id="check" type="button">Check</button>
  <button id="reset" type="button" class="ghost">Start again</button>
  <p id="score" aria-live="polite"></p>
</div>

<script>
  const questions = document.querySelectorAll('.q');
  const score = document.getElementById('score');

  document.getElementById('check').addEventListener('click', () => {
    let right = 0;
    questions.forEach((q, i) => {
      const picked = q.querySelector('input:checked');
      const ok = picked && picked.value === q.dataset.answer;
      q.classList.toggle('right', !!ok);
      q.classList.toggle('wrong', !ok);
      if (ok) right++;
    });
    score.textContent = 'Score: ' + right + ' out of ' + questions.length;
  });

  document.getElementById('reset').addEventListener('click', () => {
    questions.forEach((q) => {
      q.classList.remove('right', 'wrong');
      q.querySelectorAll('input').forEach((r) => (r.checked = false));
    });
    score.textContent = '';
  });
</script>
</body>
</html>
A reader of a TCEA blog post about building student interactives with Claude asked which platform the activities are made on, and which LMS they connect to.
The author's answer was that they run like any website, so you link to them in any LMS. That answer is the whole method.
Make it with AI
Ask for one file that carries everything. A page that depends on other files will break when it is moved. Paste this into ChatGPT, Claude or Gemini and change the topic:
Make a single self-contained HTML file: a 5-question multiple-choice
quiz on the water cycle for 12-year-olds. One question at a time, a
Check button, a short explanation after each answer, and a score at
the end. Put all CSS and JavaScript inside the file. No external
images, no login, no sending data anywhere. It must work on a phone.
Before you use the result, check four things:
- It opens in a browser by itself and the buttons respond.
- Every answer is right. Check each one yourself, because you sign off on the content.
- It is readable on a phone screen without sideways scrolling.
- The file contains no answer key you would mind a student finding by viewing the source.
Send it as a link
Open NOS, paste the HTML into a document and choose Create share link. The page renders as written and its scripts run. Anyone with the link can open it in a browser, on a phone too, without an account. They cannot edit it.
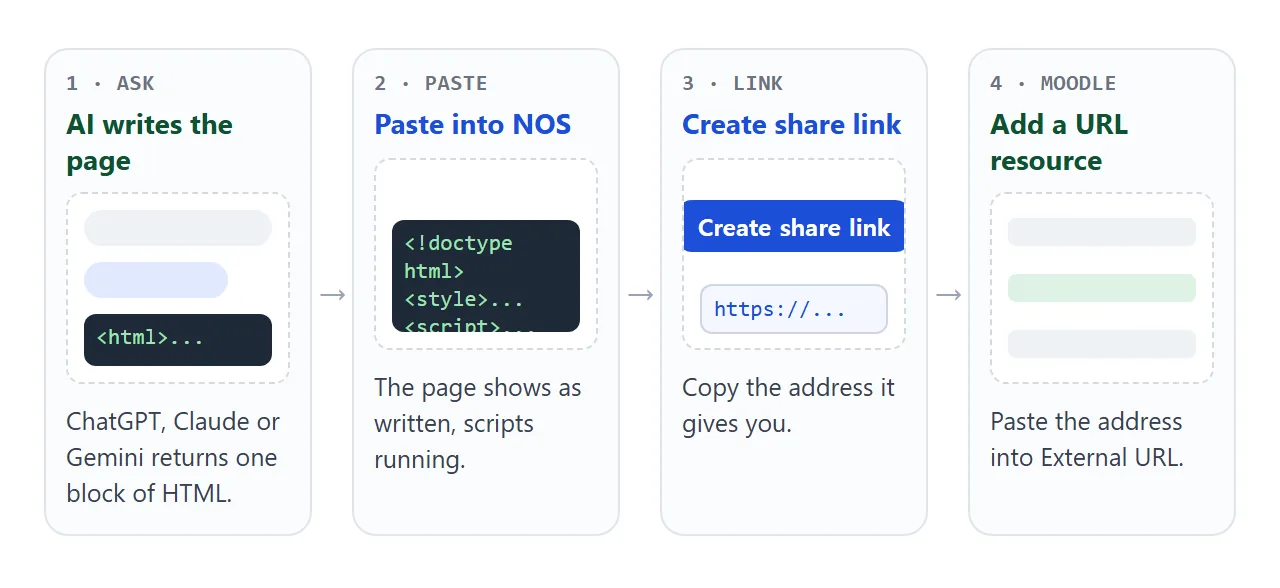
If you change the code later, the same link shows the new version.
A form that is handled inside the page works. Sending form data to a server, and loading outside images or iframes, are blocked, so ask the AI for a page that keeps everything inside itself.
Because the page cannot send anything out, scores stay on the student's screen. Nothing is reported back to Moodle.
Add the link as a URL resource
Moodle's own documentation gives the steps. Turn editing on in the course, choose URL from the activity chooser, and give it a helpful name.
In External URL, type the full address, including the https:// at the start. Then open Appearance to choose how it displays, and save.
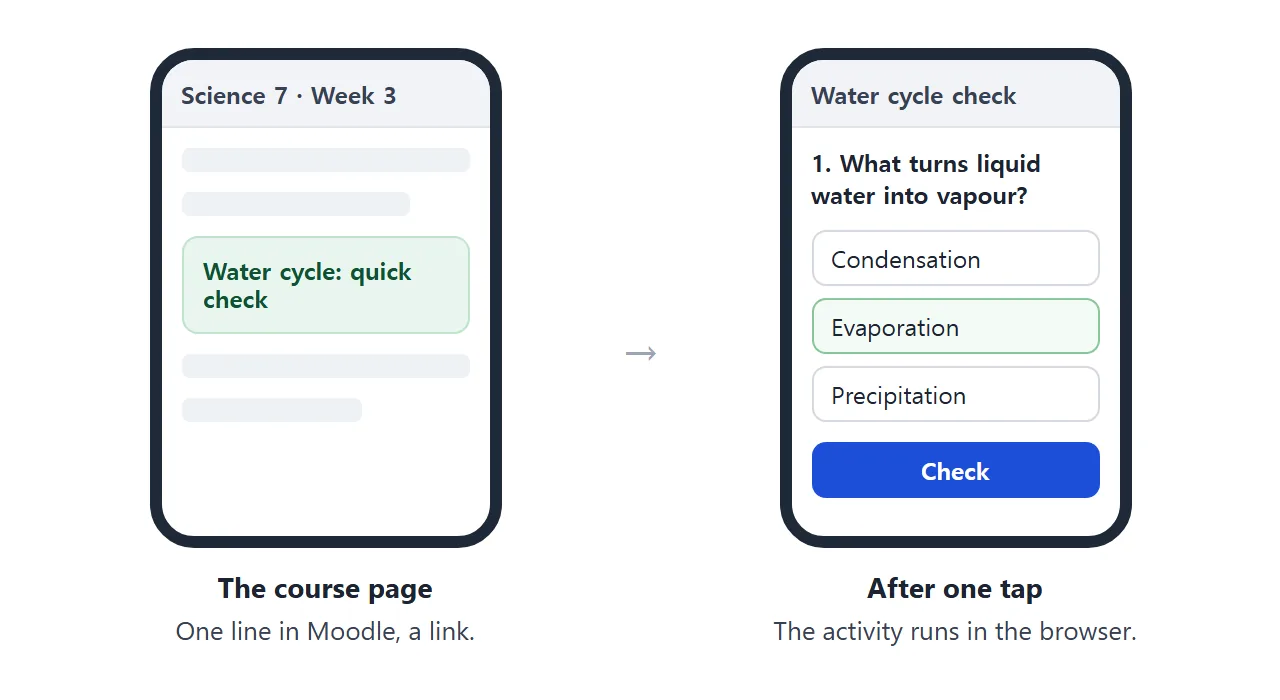
The Appearance options include Automatic, Embed, Open and In pop-up. Per the documentation, Open shows the page in the browser without the Moodle heading, blocks or footer, and Embed shows it inside the Moodle page.
In frame and New window exist too, but an administrator has to enable them. This is as of October 2026, and your site's settings can differ.
I did not find an official statement on how an embedded external page behaves, so try each option as a student before you pick one. Open is a sensible first test for a quiz on a phone.
Why pasting into the editor goes wrong
The text editor in Moodle 4.4 and later is TinyMCE. It has a source code view where you can paste HTML.
But Moodle documents that an administrator can allow extra tags so that they are not stripped out by the editor, which suggests stripping is the default.
Another page in the docs describes the capability to trust submitted content as one that lets a user enter JavaScript and other tags into places where all text is normally cleaned. It has to be enabled in the site's security settings first.
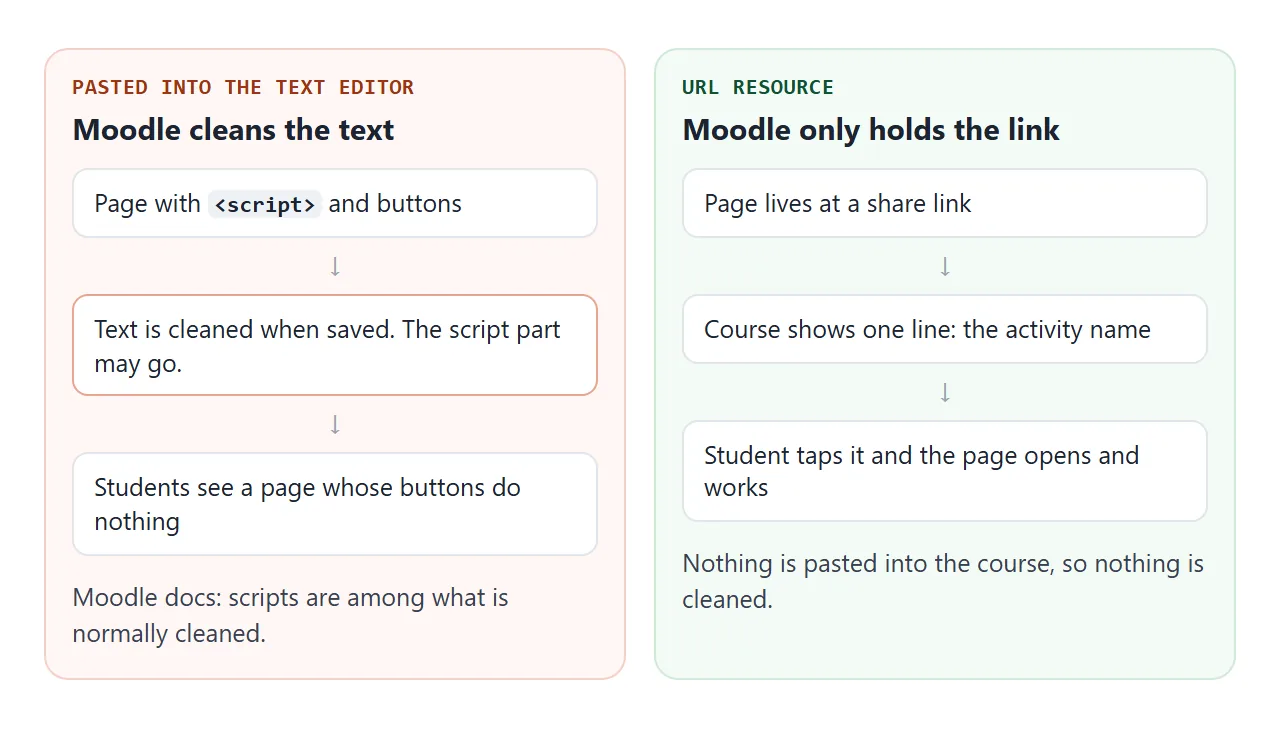
So whether pasted code survives depends on your site's settings and your role, and you may not be able to change either. A link does not depend on them.
Ways to put HTML in a course, compared
| Paste into a page | Upload as a file | Link as a URL resource | |
|---|---|---|---|
| What Moodle stores | The cleaned text | The file | An address |
| Scripts run | Depends on site settings | Not described in the docs | The page runs where it is hosted |
| Fix a typo later | Edit the page, paste again | Replace the file | Edit it once, same link |
| Needs admin help | Possibly | Possibly | No |
For files, the Moodle docs say that how students access one depends on the display settings, the file type and often the browser. They do not describe how an uploaded HTML file behaves, so test that route before you rely on it.
A second demo shows a page that works well as a link: flip cards that students can revise from on a phone.
<!doctype html>
<html lang="en">
<head>
<meta charset="utf-8">
<meta name="viewport" content="width=device-width, initial-scale=1">
<title>Weather words: flip cards</title>
<style>
  * { box-sizing: border-box; }
  body { margin: 0; padding: 16px; font-family: system-ui, sans-serif; background: #f4f6f9; color: #1d2330; text-align: center; }
  .wrap { max-width: 420px; margin: 0 auto; }
  h1 { font-size: 20px; margin: 0 0 4px; }
  .sub { margin: 0 0 14px; color: #5b6472; font-size: 14px; }
  .card {
    width: 100%; min-height: 170px; padding: 22px 18px; border: 1px solid #e1e4ea; border-radius: 14px;
    background: #fff; box-shadow: 0 6px 18px rgba(0, 0, 0, .08);
    font: inherit; color: inherit; cursor: pointer;
    display: flex; flex-direction: column; align-items: center; justify-content: center; gap: 8px;
  }
  .card.flipped { background: #eef4ff; border-color: #b9ccf5; }
  .word { font-size: 28px; font-weight: 700; }
  .meaning { font-size: 17px; line-height: 1.4; }
  .hint { font-size: 13px; color: #6b7280; }
  .nav { display: flex; align-items: center; justify-content: space-between; margin-top: 14px; }
  .nav button { font: inherit; font-weight: 600; padding: 9px 16px; border: 0; border-radius: 8px; background: #1d4ed8; color: #fff; cursor: pointer; }
  .nav button:disabled { background: #c4cad6; cursor: default; }
  #count { font-size: 14px; color: #5b6472; }
</style>
</head>
<body>
<div class="wrap">
  <h1>Weather words</h1>
  <p class="sub">Tap the card to see the meaning.</p>
  <button class="card" id="card" type="button" aria-live="polite">
    <span class="word" id="word"></span>
    <span class="meaning" id="meaning"></span>
    <span class="hint" id="hint"></span>
  </button>
  <div class="nav">
    <button id="prev" type="button">Back</button>
    <span id="count"></span>
    <button id="next" type="button">Next</button>
  </div>
</div>

<script>
  const cards = [
    ['drizzle', 'Very light rain in small drops.'],
    ['gust', 'A short, strong rush of wind.'],
    ['humid', 'Containing a lot of water vapour in the air.'],
    ['overcast', 'Covered completely by cloud.'],
    ['forecast', 'A report of the weather expected in the coming days.'],
  ];
  let i = 0;
  let flipped = false;

  const card = document.getElementById('card');
  const word = document.getElementById('word');
  const meaning = document.getElementById('meaning');
  const hint = document.getElementById('hint');
  const prev = document.getElementById('prev');
  const next = document.getElementById('next');
  const count = document.getElementById('count');

  function show() {
    word.textContent = cards[i][0];
    meaning.textContent = flipped ? cards[i][1] : '';
    hint.textContent = flipped ? '' : 'Tap to flip';
    card.classList.toggle('flipped', flipped);
    count.textContent = (i + 1) + ' of ' + cards.length;
    prev.disabled = i === 0;
    next.disabled = i === cards.length - 1;
  }

  card.addEventListener('click', () => { flipped = !flipped; show(); });
  prev.addEventListener('click', () => { i--; flipped = false; show(); });
  next.addEventListener('click', () => { i++; flipped = false; show(); });
  show();
</script>
</body>
</html>
When it does not work
| What you see | Cause | Fix |
|---|---|---|
| Buttons do nothing after pasting into a page | Moodle cleaned the pasted text | Host the page and add a URL resource |
| The page looks cramped inside the course | Embed shows it inside the Moodle page | Change Appearance to Open and test again |
| In frame or New window is missing | An administrator has not enabled it | Use Automatic, Open or In pop-up |
| The link gives an error | The address was copied incomplete | Copy the full share link, starting with https:// |
| The score is not in the gradebook | The page cannot send results to Moodle | Use a Moodle quiz for marks, the link for practice |
For the longer picture of keeping interactive material outside the platform, see how to host a web page for a Moodle course. To build a better quiz than the one above, read HTML quiz.
Check it as a student
A URL resource is a link to a website, and the Appearance setting decides how it displays. Before you announce it, open the course as a student would, on a phone and on a laptop. If it opens and the buttons respond, you are done.
If you later change the page, edit the code in NOS. The same link shows the new version, so the course does not need touching.