To convert HTML to PDF on Mac, open the file in a browser and press Cmd+P. Where the PDF option sits depends on which browser you used, and that is the only thing that trips people up.
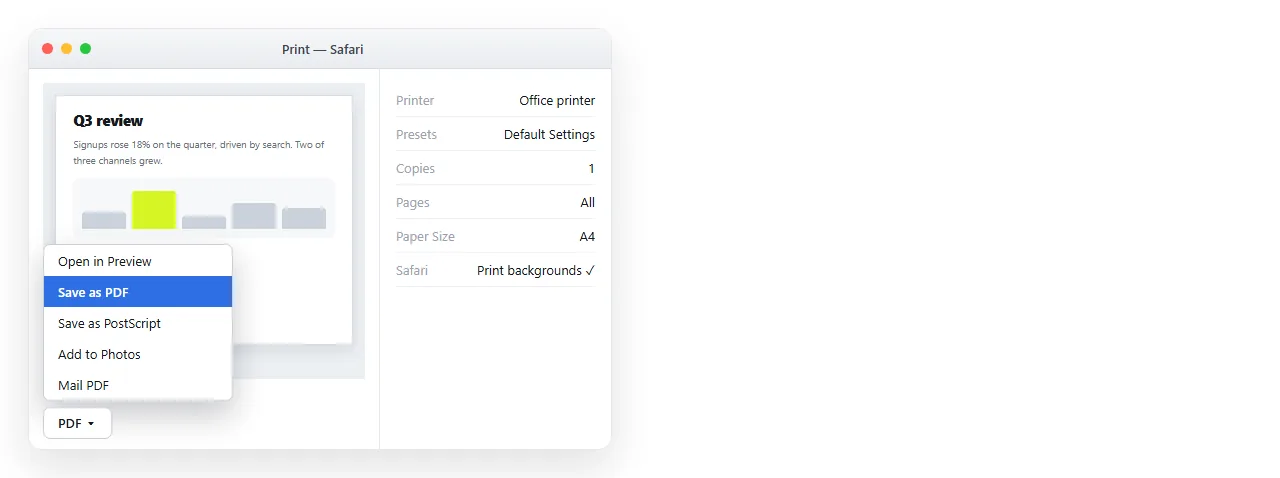
Safari uses the system print sheet, so Save as PDF lives in a small dropdown at the bottom left. Chrome uses its own dialog, where Save as PDF is a destination at the top.
Nothing is stamped on the output in either case. PDF export with no watermark covers where watermarks actually come from.
HTML to PDF on Mac: which browser to use
| Browser | PDF control | Background setting |
|---|---|---|
| Safari | PDF dropdown, bottom left of the system sheet | Show Details, then Print backgrounds |
| Chrome | Destination selector, top of its own dialog | More settings, then Background graphics |
| Firefox | Destination selector, its own dialog | More settings, then Print backgrounds |
| Terminal | Headless Chrome, --print-to-pdf |
On by default |
Use whichever browser you were already viewing the page in. The export uses the engine that drew the page, so a page that looks right in Safari exports most faithfully from Safari.
The Safari route
- Drag the
.htmlfile onto Safari. - Press Cmd+P.
- Click Show Details if the sheet is collapsed.
- Tick Print backgrounds. Without it, shaded headers and coloured sections come out white.
- Set the paper size, and switch to landscape if the layout is wide.
- Open the PDF dropdown at the bottom left and choose Save as PDF.
Step four is the one everyone misses, because the checkbox is hidden until the details panel is open.
Safari also offers Open PDF in Preview in the same dropdown, which is quicker when you want to check the result before committing to a filename.
Two Safari specifics are worth knowing. The Reader view, if it is active, prints the stripped version rather than the page, so turn it off first.
And a file opened straight from Finder loads under the file:// scheme, where some scripts refuse to run for security reasons. If a chart is missing from the preview, that is usually why. The file protocol covers what it blocks.
The Chrome route
Chrome on macOS shows its own dialog rather than the system sheet. Everything is in one place.
- Open the file, press Cmd+P.
- Set Destination to Save as PDF.
- Open More settings.
- Tick Background graphics.
- Untick Headers and footers to remove the title and date line.
- Set Scale if the preview shows more pages than you want.
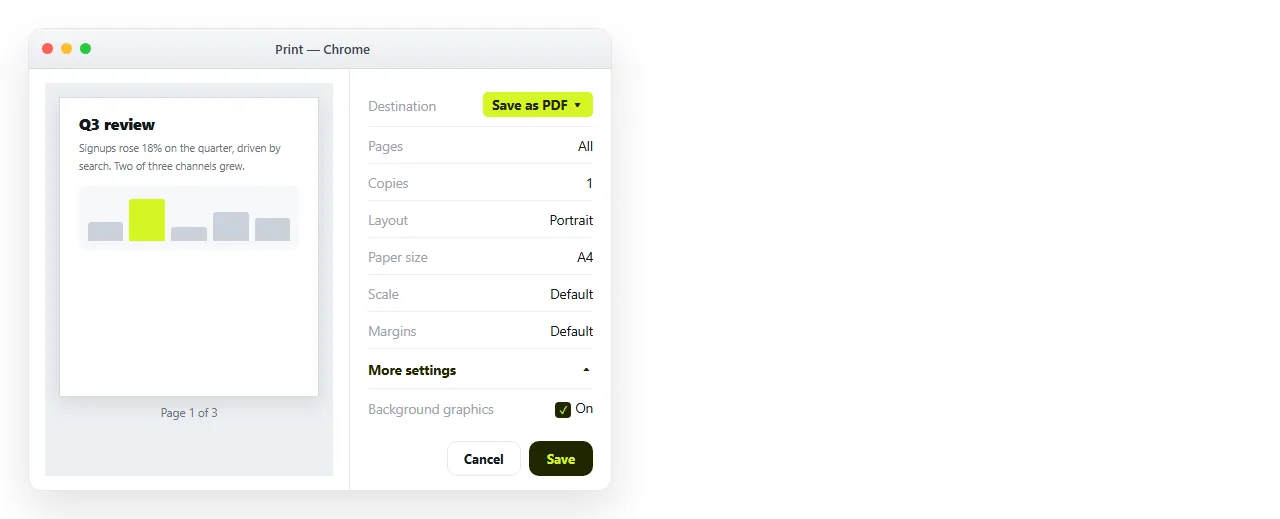
Chrome also has a Print using system dialog link at the bottom, which hands you back to the Safari style sheet. Rarely needed, occasionally useful for a specific printer setting.
The Terminal route, for a folder of files
If you have twenty files to convert, doing it by hand is the wrong shape of work.
"/Applications/Google Chrome.app/Contents/MacOS/Google Chrome" \
  --headless --disable-gpu \
  --print-to-pdf=/Users/you/out/q3.pdf \
  --no-pdf-header-footer \
  file:///Users/you/reports/q3.html
Wrap that in a loop over the folder and you are done. Flag names have changed between Chrome versions, so verify against the build you have installed rather than trusting an old snippet.
The file must be reachable as a file:// address, and anything it references by relative path must still be beside it.
Quote the path to Chrome. The space in the application name will otherwise split the command into pieces and you will get a confusing not found error.
If Chrome is already running with a normal window open, headless mode can refuse to start against the same profile. Add a separate user data directory, or quit the browser first.
The settings that decide the result
Same on macOS as anywhere else, and worth listing because the Mac dialogs bury them.
- Backgrounds on. The difference between a report and a grey sheet.
- Headers and footers off. Otherwise every page carries the title and the date.
- Margins. None for dashboards, default for prose.
- Orientation. Landscape for anything wide, before you start shrinking the scale.
- A print stylesheet. Hides navigation and stops tables breaking mid row.
@media print {
  .nav, .sidebar { display: none; }
  table, figure { break-inside: avoid; }
  body { background: #fff; color: #111; }
}
Print stylesheets and exporting without losing formatting cover these in depth.
Checking the file in Preview
Preview is the right place to review the export, even though it cannot open HTML.
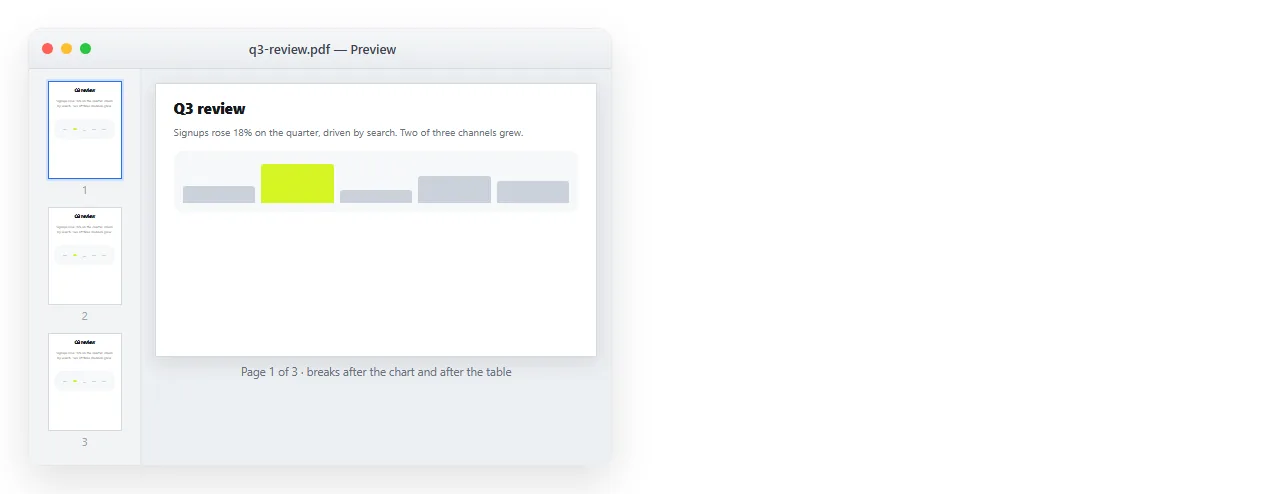
Open the thumbnail sidebar and look at the page boundaries. That is where break rules prove themselves. Preview also deletes and reorders pages, which handles a stray blank final page without any other software.
If the document will change again
A PDF is a snapshot. Send it twice and two versions are circulating.
For anything read more than once, put the page at an address instead. Paste the HTML into a NOS document, then Share, Share link, Create link. Editing the page does not move the address, so last month's link is still current.
Turning HTML into a link is that step on its own.