"Ionic" here means Ionic Framework, an open source UI toolkit of ready-made components: buttons, lists, toggles, toolbars. It is not a build tool. In one HTML file you load it with a script tag and a stylesheet tag, then write tags like <ion-button>.
Try it first. Type a name, then press the button.
<!doctype html>
<html lang="en">
<head>
<meta charset="utf-8">
<meta name="viewport" content="width=device-width, initial-scale=1">
<title>Ionic in one HTML file</title>
<!-- Ionic web components + stylesheet, pinned to one version -->
<script type="module" src="https://cdn.jsdelivr.net/npm/@ionic/core@9.0.6/dist/ionic/ionic.esm.js"></script>
<link rel="stylesheet" href="https://cdn.jsdelivr.net/npm/@ionic/core@9.0.6/css/ionic.bundle.css">
</head>
<body>
<ion-app>
  <ion-header>
    <ion-toolbar color="primary">
      <ion-title>Hello Ionic</ion-title>
    </ion-toolbar>
  </ion-header>
  <ion-content class="ion-padding">
    <ion-input id="name" label="Your name" label-placement="floating" fill="outline" placeholder="Type here"></ion-input>
    <p id="out">Nothing typed yet.</p>
    <ion-button id="greet" expand="block">Say hello</ion-button>
    <ion-toast id="toast" trigger="greet" message="Hello from a single HTML file" duration="2000"></ion-toast>
  </ion-content>
</ion-app>

<script>
  const input = document.getElementById('name');
  const out = document.getElementById('out');
  // ionInput fires on every keystroke; the text is in event.detail.value
  input.addEventListener('ionInput', (e) => {
    out.textContent = e.detail.value ? 'Hi, ' + e.detail.value + '!' : 'Nothing typed yet.';
  });
</script>
</body>
</html>
Ionic's components are web components, so the browser treats ion-button and ion-input as ordinary tags once the script has registered them. Your own JavaScript can talk to them with normal addEventListener calls.
The two tags that load Ionic
Both tags go inside <head>. Ionic's documentation recommends jsDelivr for this.
<script type="module" src="https://cdn.jsdelivr.net/npm/@ionic/core@9.0.6/dist/ionic/ionic.esm.js"></script>
<link rel="stylesheet" href="https://cdn.jsdelivr.net/npm/@ionic/core@9.0.6/css/ionic.bundle.css">
The script defines the components. The stylesheet is the CSS bundle with all of Ionic's global styles.
The address above has @9.0.6 in it on purpose. Ionic's own snippet has no version number.
On 2026-10-01 the unversioned address returned version 9.0.4 while the npm registry listed 9.0.6 as latest. A pinned address always returns the same files, so your page keeps looking the same.
In short:
- Put the script and stylesheet in the head, with a version.
- Start the file with the doctype and wrap the body in one
<ion-app>. - Add
<ion-header>and<ion-content>inside it. - Listen to Ionic's events for input.
How the page is laid out
An Ionic page is a few nested tags. ion-app wraps everything, and Ionic's documentation says there should be only one per project. ion-header holds toolbars at the top. ion-content is the scrolling area and fills the height left over.
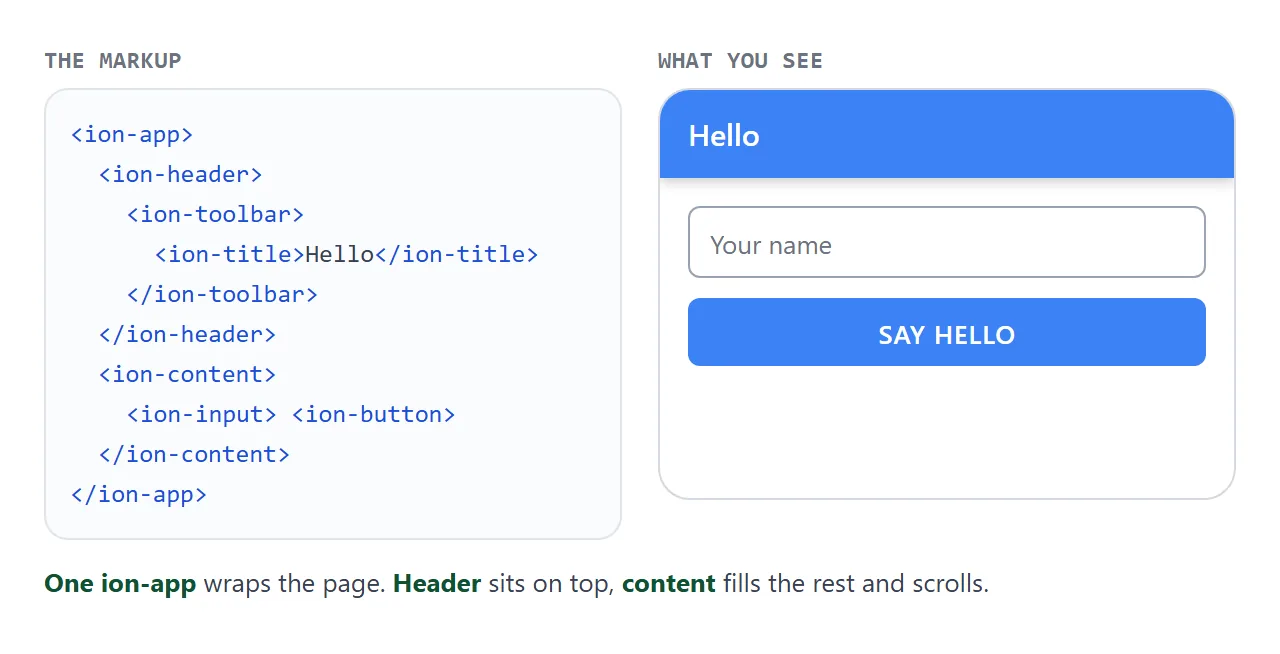
Plain HTML still works next to the components. In the first example, the paragraph that says "Hi, Ada!" is an ordinary <p> inside ion-content. The class ion-padding on ion-content adds the standard inner spacing.
Add the viewport meta tag as well, so the page is sized for a phone screen.
Reading input: Ionic's own events
Ionic components fire their own events, named with an ion prefix. The new value is in event.detail.
| Component | Event | Read this from event.detail |
|---|---|---|
ion-input |
ionInput |
value, on every keystroke |
ion-toggle |
ionChange |
checked |
ion-checkbox |
ionChange |
checked |
ion-segment |
ionChange |
value |
Buttons need no special event. A normal click listener works, as in the second and third examples.
iOS look, Material look, and your colors
Every Ionic component has a mode: ios or md (Material Design). Each platform has a default, and a component can override it with the mode attribute. Colors come from CSS variables, and the color attribute picks one of nine named colors.
<!doctype html>
<html lang="en">
<head>
<meta charset="utf-8">
<meta name="viewport" content="width=device-width, initial-scale=1">
<title>Ionic modes and colors</title>
<script type="module" src="https://cdn.jsdelivr.net/npm/@ionic/core@9.0.6/dist/ionic/ionic.esm.js"></script>
<link rel="stylesheet" href="https://cdn.jsdelivr.net/npm/@ionic/core@9.0.6/css/ionic.bundle.css">
<style>
  body { font-family: system-ui, sans-serif; margin: 0; padding: 14px; background: #f4f5f7; }
  .row { display: flex; flex-wrap: wrap; gap: 14px; }
  .panel { flex: 1 1 200px; background: #fff; border-radius: 10px; padding: 12px; }
  .panel h4 { margin: 0 0 10px; font-size: 14px; }
  .panel ion-button { display: block; margin-bottom: 10px; }
  /* Change a theme color for every Ionic component on the page */
  :root.brand {
    --ion-color-primary: #0f766e;
    --ion-color-primary-rgb: 15, 118, 110;
    --ion-color-primary-contrast: #ffffff;
    --ion-color-primary-contrast-rgb: 255, 255, 255;
    --ion-color-primary-shade: #0d6860;
    --ion-color-primary-tint: #278480;
  }
  .bar { margin-top: 14px; }
</style>
</head>
<body>
<div class="row">
  <div class="panel">
    <h4>mode="md" (Material)</h4>
    <ion-button mode="md">Solid</ion-button>
    <ion-button mode="md" fill="outline">Outline</ion-button>
    <ion-toggle mode="md" checked>Toggle</ion-toggle>
  </div>
  <div class="panel">
    <h4>mode="ios"</h4>
    <ion-button mode="ios">Solid</ion-button>
    <ion-button mode="ios" fill="outline">Outline</ion-button>
    <ion-toggle mode="ios" checked>Toggle</ion-toggle>
  </div>
</div>
<div class="bar">
  <ion-button id="theme" color="medium">Switch primary to teal</ion-button>
  <ion-button color="primary">Primary button</ion-button>
</div>

<script>
  const root = document.documentElement;
  const btn = document.getElementById('theme');
  // The class on <html> turns on the --ion-color-primary values above
  btn.addEventListener('click', () => {
    root.classList.toggle('brand');
    btn.textContent = root.classList.contains('brand') ? 'Switch primary back' : 'Switch primary to teal';
  });
</script>
</body>
</html>
To change a color, set every related variable, not only the main one. Ionic's documentation says to set all of them when changing a color. The example above sets six for primary.
A finished example: a task list
The same pieces make a small app. This one filters with ion-segment, ticks tasks with ion-checkbox, and adds new rows from an ion-input. The data lives in a plain JavaScript array, and nothing is saved when the page closes.
<!doctype html>
<html lang="en">
<head>
<meta charset="utf-8">
<meta name="viewport" content="width=device-width, initial-scale=1">
<title>Ionic task list</title>
<script type="module" src="https://cdn.jsdelivr.net/npm/@ionic/core@9.0.6/dist/ionic/ionic.esm.js"></script>
<link rel="stylesheet" href="https://cdn.jsdelivr.net/npm/@ionic/core@9.0.6/css/ionic.bundle.css">
</head>
<body>
<ion-app>
  <ion-header>
    <ion-toolbar>
      <ion-title>Tasks</ion-title>
    </ion-toolbar>
    <ion-toolbar>
      <ion-segment id="filter" value="all">
        <ion-segment-button value="all"><ion-label>All</ion-label></ion-segment-button>
        <ion-segment-button value="open"><ion-label>Open</ion-label></ion-segment-button>
        <ion-segment-button value="done"><ion-label>Done</ion-label></ion-segment-button>
      </ion-segment>
    </ion-toolbar>
  </ion-header>
  <ion-content>
    <ion-list id="list"></ion-list>
    <div class="ion-padding">
      <ion-input id="newTask" label="New task" label-placement="floating" fill="outline"></ion-input>
      <ion-button id="add" expand="block" class="ion-margin-top">Add task</ion-button>
      <p id="count" style="font-family:system-ui,sans-serif;font-size:14px"></p>
    </div>
  </ion-content>
</ion-app>

<script>
  // Data lives in a plain array; the list is redrawn from it
  const tasks = [
    { text: 'Paste the page into NOS', done: true },
    { text: 'Create share link', done: false },
    { text: 'Send it to a friend', done: false },
  ];
  let filter = 'all';
  const list = document.getElementById('list');
  const input = document.getElementById('newTask');

  function render() {
    list.innerHTML = '';
    tasks.forEach((t) => {
      if (filter === 'open' && t.done) return;
      if (filter === 'done' && !t.done) return;
      const item = document.createElement('ion-item');
      const box = document.createElement('ion-checkbox');
      box.checked = t.done;
      box.textContent = t.text;  // the checkbox label is its text content
      // ionChange: event.detail.checked holds the new state
      box.addEventListener('ionChange', (e) => { t.done = e.detail.checked; updateCount(); });
      item.appendChild(box);
      list.appendChild(item);
    });
    updateCount();
  }
  function updateCount() {
    const open = tasks.filter((t) => !t.done).length;
    document.getElementById('count').textContent = open + ' open, ' + (tasks.length - open) + ' done';
  }

  document.getElementById('filter').addEventListener('ionChange', (e) => {
    filter = e.detail.value;
    render();
  });
  document.getElementById('add').addEventListener('click', () => {
    const text = (input.value || '').trim();
    if (!text) return;
    tasks.push({ text, done: false });
    input.value = '';
    render();
  });
  render();
</script>
</body>
</html>
The page redraws the list from the array each time something changes. That keeps the code short enough to read in one screen.
When it does not work
The first three rows were reproduced with version 9.0.6 in a desktop browser. The others follow Ionic's documentation and the version check above.
| What you see | Cause | Fix |
|---|---|---|
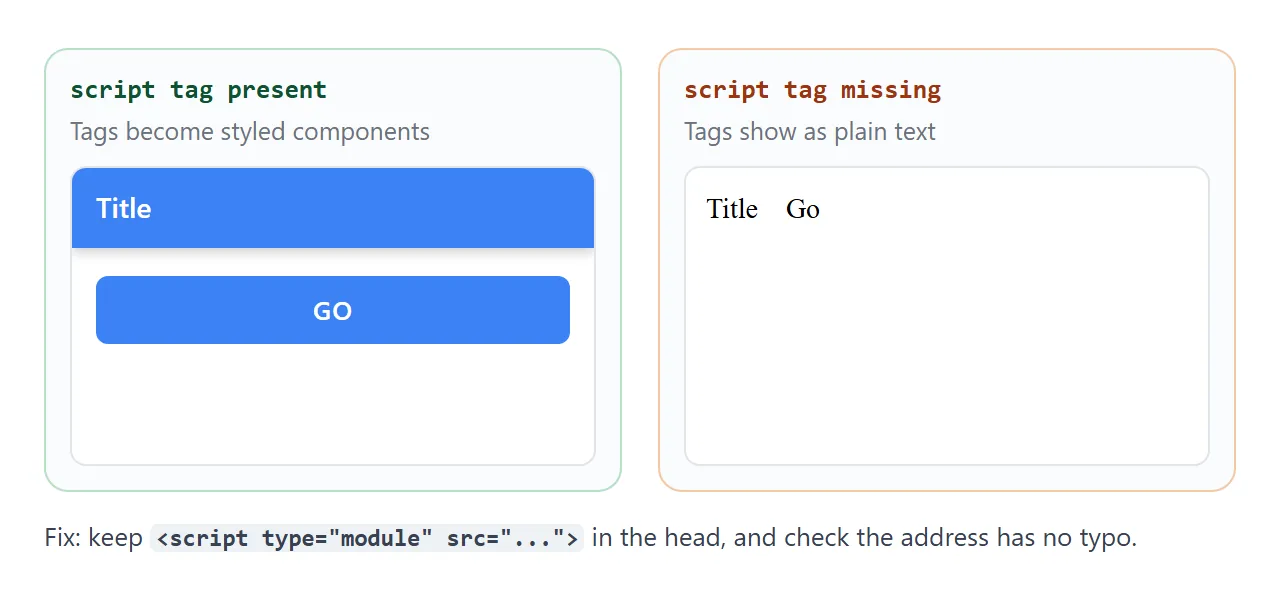
| Plain text where components should be | The script tag is missing, blocked, or has a typo in the address | Check the module script in the head |
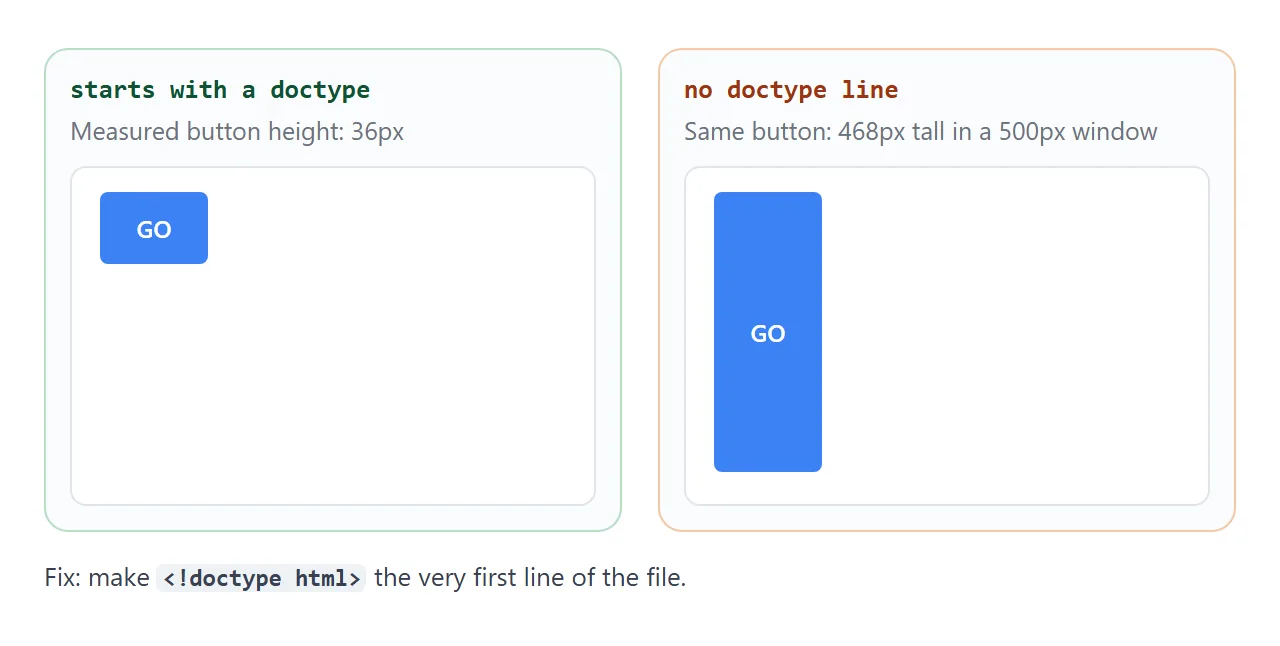
| A button stretched tall | The file has no doctype, so the browser uses quirks mode | Make <!doctype html> the first line |
ion-padding does nothing, margins look raw |
The stylesheet link is missing | Add the CSS bundle link |
| Color only partly changes | Only one color variable was set | Set all six variables for that color |
| Different look on iPhone and desktop | Default mode differs per platform | Set the mode attribute |
| You get a different version than you tested | The address has no version | Add a version such as @9.0.6 |
The first two rows are easy to see side by side.
Share it as a link
An Ionic page is made to be touched, so a screenshot loses the point. A bare .html attachment may open as plain code on a phone. Opening an HTML file on a phone covers why.
To send the working version, paste the page into a NOS document and choose Create share link. HTML to link walks through it.
The page renders as written and its scripts run, so the two CDN tags load and the people you send it to can use the inputs and toggles themselves. If you change the code, the same link shows the new version.
Other single-file starting points are in single HTML file apps.